Showing posts with label DIY. Show all posts

Friday, January 20, 2012

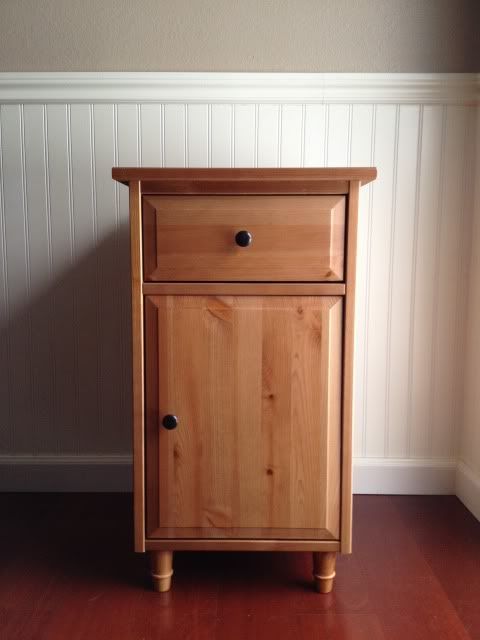
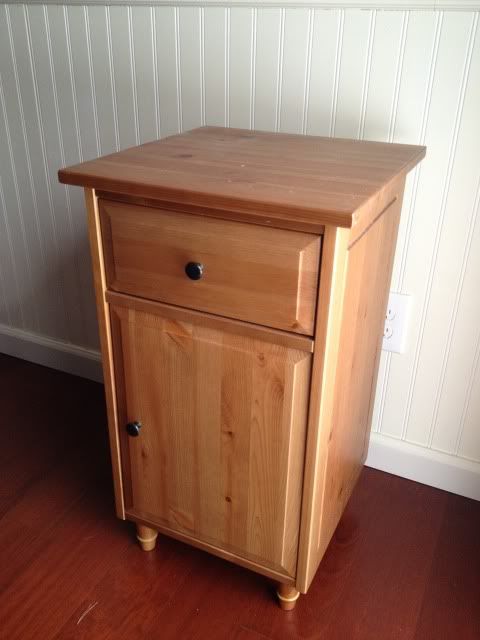
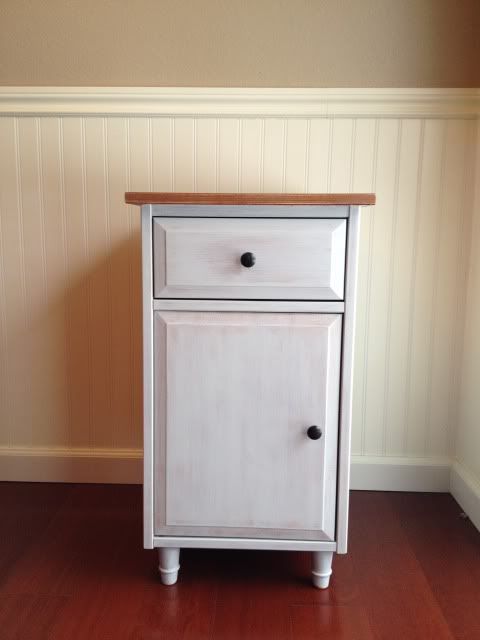
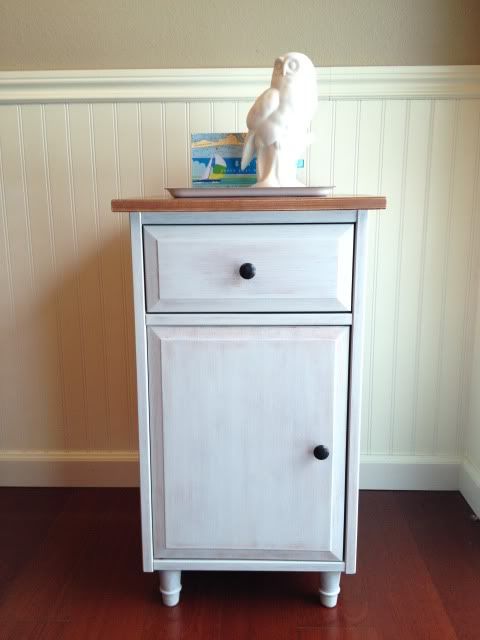
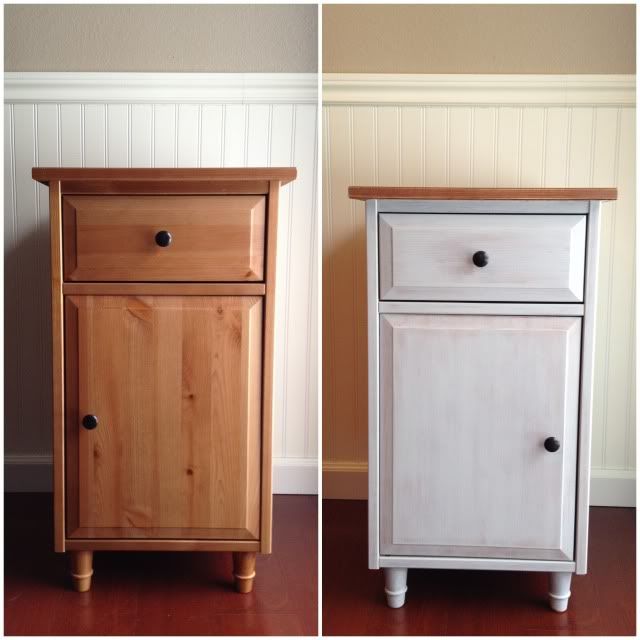
IKEA Hemnes Night Stand Makeover

I found this on Pinterest and freaked out a little. I liked it so much, I thought I could try my hand at updating my four year old Hemnes night stands from IKEA.


This was a $6 makeover. $5 for a tiny can of stain and $1 for the two foam brushes. I could have used stain and foam brushes that I already had, but I'm pretty sure the stain is in the garage is either a. frozen or b. dried out because I didn't put the lid back on it all the way. And the foam brushes? I know I have some, I just figured it was easier to buy them rather than rummaging through the house. The paint I had on hand.

Before:


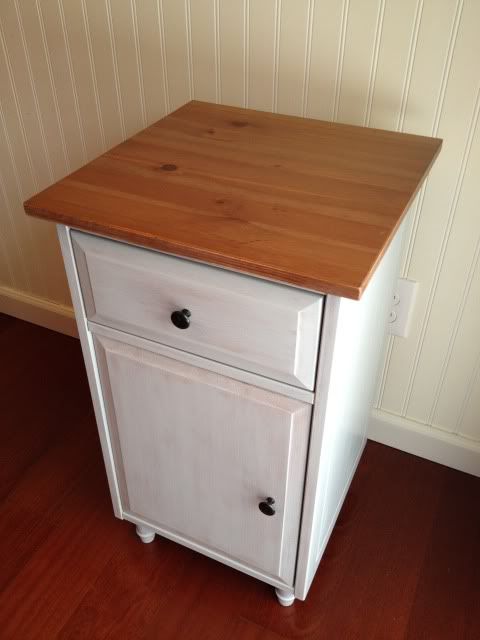
After:


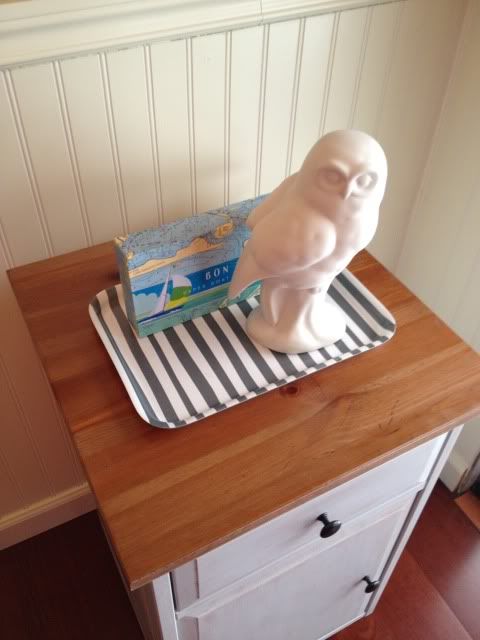
And now for staged photos with random props gathered from my house:

Bon Voyage Note Cards - Gift from Ashley
White Ceramic Owl - Gift from my mother
Gray & White Tray - Ikea circa 2010

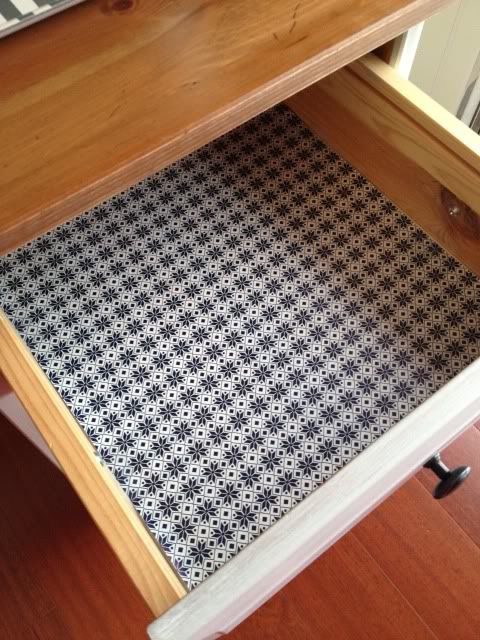
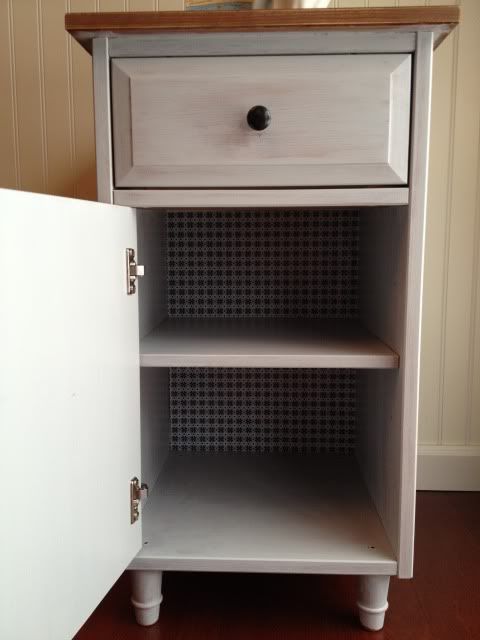
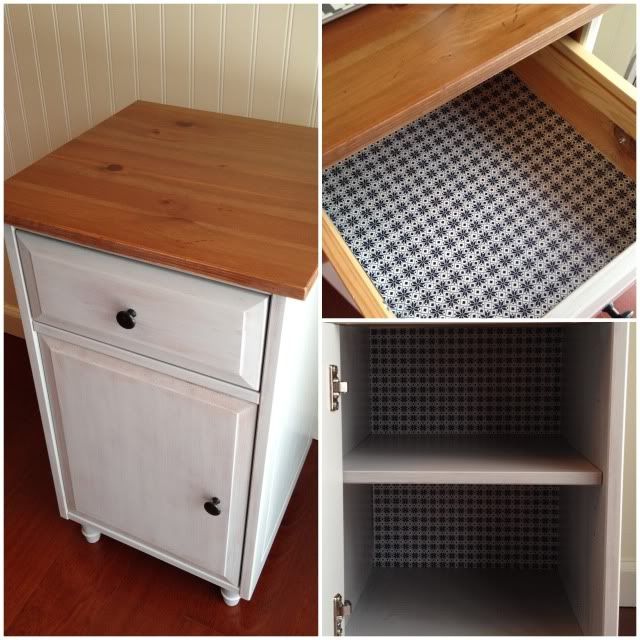
And check me out. Pizazzing up the insides!

Wrapping Paper cut to size - IKEA circa 2010

You were pretty cute before little thing, but you're fitting the beach cottage chic of my bedroom even better now!


Stain: Minwax Red Oak
Paint: Martha Stewart Driftwood
Both available at Home Depot.

If you're thinking of tackling a small project like this, it's easy! You could get away with purchasing a tester bottle of the Martha Stewart paint for around $3, a small can of stain for $5 and a couple foam brushes (one for the paint, one for the stain). I applied two less than perfect coats of paint with a large foam brush and three coats of stain. I wanted a worn, shabby look, so in between coats I sanded a bit with an ultra fine sanding block I had on hand and rubbed a little stain along the edges of the drawer and door. 

And that's that! Hope you enjoyed!

Tuesday, August 23, 2011

The Baby Shower

I was treated to the most beautiful shower I've ever had the pleasure of attending. My mom and her friends are absolutely amazing when it comes to planning. The decor was gorgeous and the food was delicious. I'm lucky enough to have cousins who bake like professionals and they provided the most amazing cake and cupcakes.

Myself, my mom and my sister.

The shower theme was nautical. We love living on Whidbey Island, we love the ocean that surrounds us and we love our boat. We are so excited to introduce the northwest island life to our son and nothing fits us better than all things nautical.

The afghan on the left with the anchor was hand made by my cousin, Rachel. She did an amazing job. The quilt on the left was made by our close friend and neighbor, Uschi. The quilt was one of my very first gifts for the baby. I completely skipped a bedding set because of this quilt. The rocking horse is from my friend, Alison. She stained it to match his bedroom.

Poms, eyelet lanterns and stars hung above the food table. They've all come home with me to hang in his bedroom. The giant frame was held chicken wire - I took photos early so you don't get to see all the adorable photos that were attached of his ultrasounds, my weekly belly photos and a few of me as a child.


The shower was at 11:00am, so we had a brunch spread. It was delicious. Mini crustless quiches, strawberry spinach salad with the most amazing dressing I've ever tasted and fresh bakery bread.


There was a great sparkling fruit punch along with lemon water. We drank from mason jars and each little straw had the cutest little striped red and blue flags on them.

The cupcakes were made my the Cupcake Queen herself, my cousin Rachel. She knows how much I love fondant and she made marshmallow fondant star toppers for each cupcake. I'm also a frosting girl, and she totally outdid herself on the frosting for these cupcakes. I was in heaven.

My cousin, Brynn made the blue velvet ruffle cake. I'd come across a picture of one on Pinterest and had to have it. This is the absolute best velvet cake I've ever eaten in my life. The frosting was cream cheese and sadly didn't like the sun. But I don't care, it was delicious! My sister came across this adorable whale topper and my brother colored it for her. It was pretty sweet of him!


The blessing table was incredible. Each guest wrote a sweet note to our baby boy and hung it on the line. At the end of the shower they were collected in a small album for me to take home. I'll get to read each blessing and prayer to him as he grows.

Pinwheels made the center pieces on each table and were the favors for our guests to take home. My mom let me help with these, which I loved. I'm a crafty person so I was happy I got to help with something!

The little guy was spoiled rotten!

Carrie, Jennifer, Mom & Lisa

These are the ladies that made it happen. Carrie hosted in her gorgeous back yard, making for one heck of a garden party. They all helped my mom collect and implement ideas. They set up and took down the entire thing and also helped prepare the food. They're amazing and my mom is so lucky to have the best friends.

There are more pictures floating around on other cameras. When I end up with those I'll post more of the fun. A big thank you to everyone who made the shower so incredible special. I felt beyond blessed. From those who helped plan and put on, to those friends and family members that attended. It was an amazing day I'll never forget.

Thursday, August 11, 2011

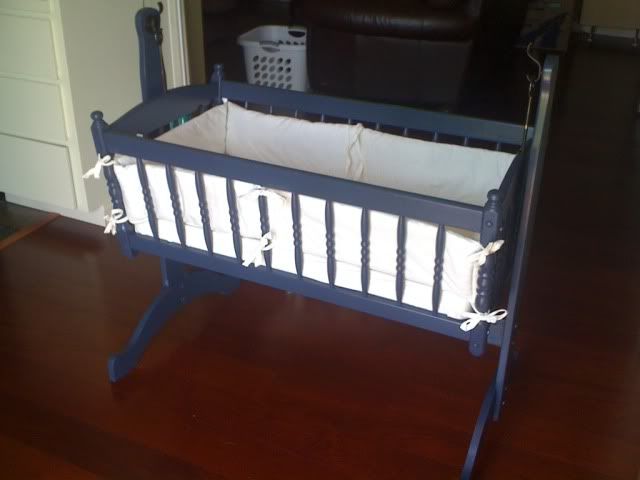
A project! Baby Boy's Cradle

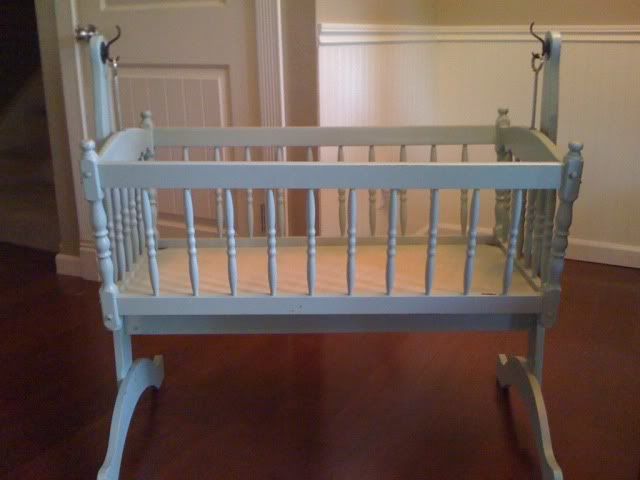
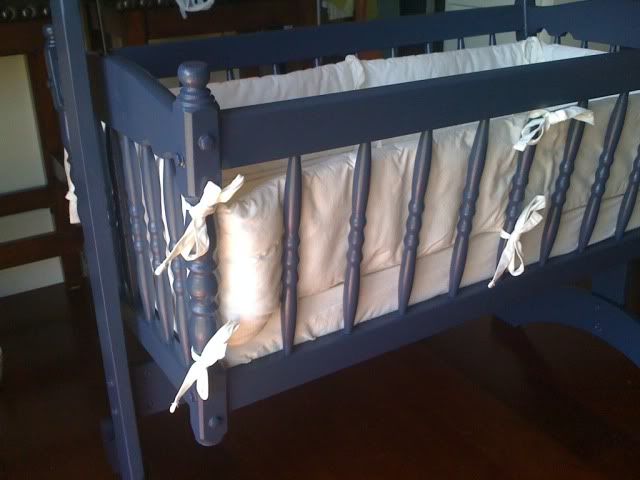
I am so excited to be sharing this before and after. I couldn't be bothered to take any better pictures, but they still show just how beautiful this piece of furniture is.

I was searching Craigslist several months ago for a dresser for the baby's room. I had no luck with a dresser, but I did find this great cradle! I sent a picture of it to my husband who immediately replied that we must have it. The next day I picked it up from a darling military family in town. Her very last little boy had outgrown it and she was (not so ready) to part with it.

We wrangled it in to the back of my sister's Volkswagon Beetle (boy was that a task!) and went on our merry way. We made a pit stop at the grocery store on the way home, and while inside a woman spied the cradle in the back seat of the car. She was in the process of leaving us a note about it when we came out. Her daughter-in-law was due in September and she wanted to know if we were selling it. Nope! Sorry! She was bummed, but wished me well.


It's an old piece that had obviously been modified and that was just fine. I'd take it apart to paint it and put it back together ensuring it's stability. It also came with a brand new mattress, off white sheet and set of bumpers (only 3 months used). I'd started pulling it apart to prep it and realized I should probably take a before picture.


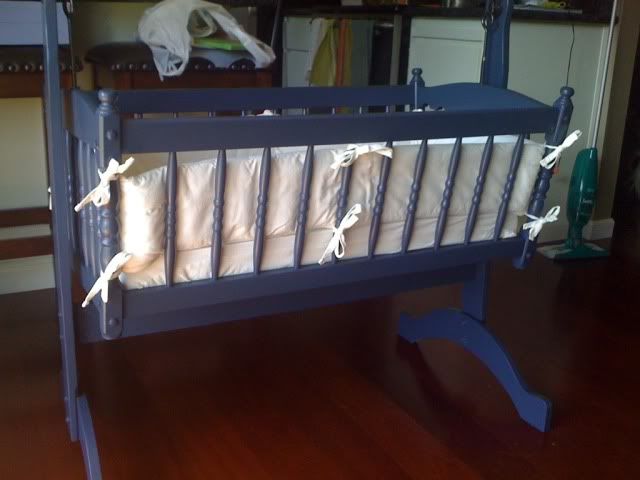
I absolutely love the way it turned out. It took some sanding and wiping down to prep it. Then it took a tedious 4 coats of paint with a foam brush. I actually chose to pick up a quart of Martha Stewart's Wrought Iron (the lighting doesn't really do the color justice) rather than using spray paint. Baby boy's color is a dark muted navy blue. There just weren't a lot of options in spray paint matching what I really wanted for this piece and it would have been far more expensive for the amount of cans I needed. I didn't even use 1/4 of my quart of paint and now I have more left over for other projects for his room. I did pick up a can of spray paint matching the hooks the cradle hangs from for the rest of the hardware.

This picture doesn't show the completed project. The eye bolts currently on the cradle are old and rusted. We weren't able to find the same size at the hardware store so we attempted to spray them to match the hooks. Problem was, we can't tighten the bolts at the bottom any farther up. This means the stop on the cradle (the function is there, but we have to create a new stop) won't work. Can't have the baby unsecured while sleeping and unattended. We've picked up some marine rope that we'll be replacing the eye hooks with, keeping with my nautical feel. We can then adjust the height to ensure the stop works properly.

The stop is a small dowel that I painted the same color as the hardware. We picked up a small crystal knob to attach to the end of the dowel to place and remove the stop. It will be attached to the frame with a piece of marine rope so that it doesn't get lost. If I don't attach it, I'll lose it for sure. That's just how I am! I am overall pleased with the quality of this old piece and the stability after modifying it. I can't wait to have baby boy sleeping in it!

Total project cost:

Cradle: $40
Paint: $13
2 foam brushes: $1
Spray paint: $8
Dowel: $1
Decorative knob: $4
Rope: $5

Total: $72!

Still less than half the price of a brand new cradle and the bedding was included! I love to restore old peices and I know that as we use this for our son and future children, that mommy and daddy made it just for them. Love that!

The cradle will be decorated with a custom pillow that I plan to make, along with two very adorable blankets I've crocheted for my little man. It will all be ready for his arrival so I'll have pictures posted of it in it's final resting place before he gets here!

Saturday, January 1, 2011

DIY: Tea is for Tags.

The last minute touches for the craft fair was probably the best part. After working my little fingers to the bone creating some of the cutest stuff, stuff I loved, it was nice to get to be creative in a different way.

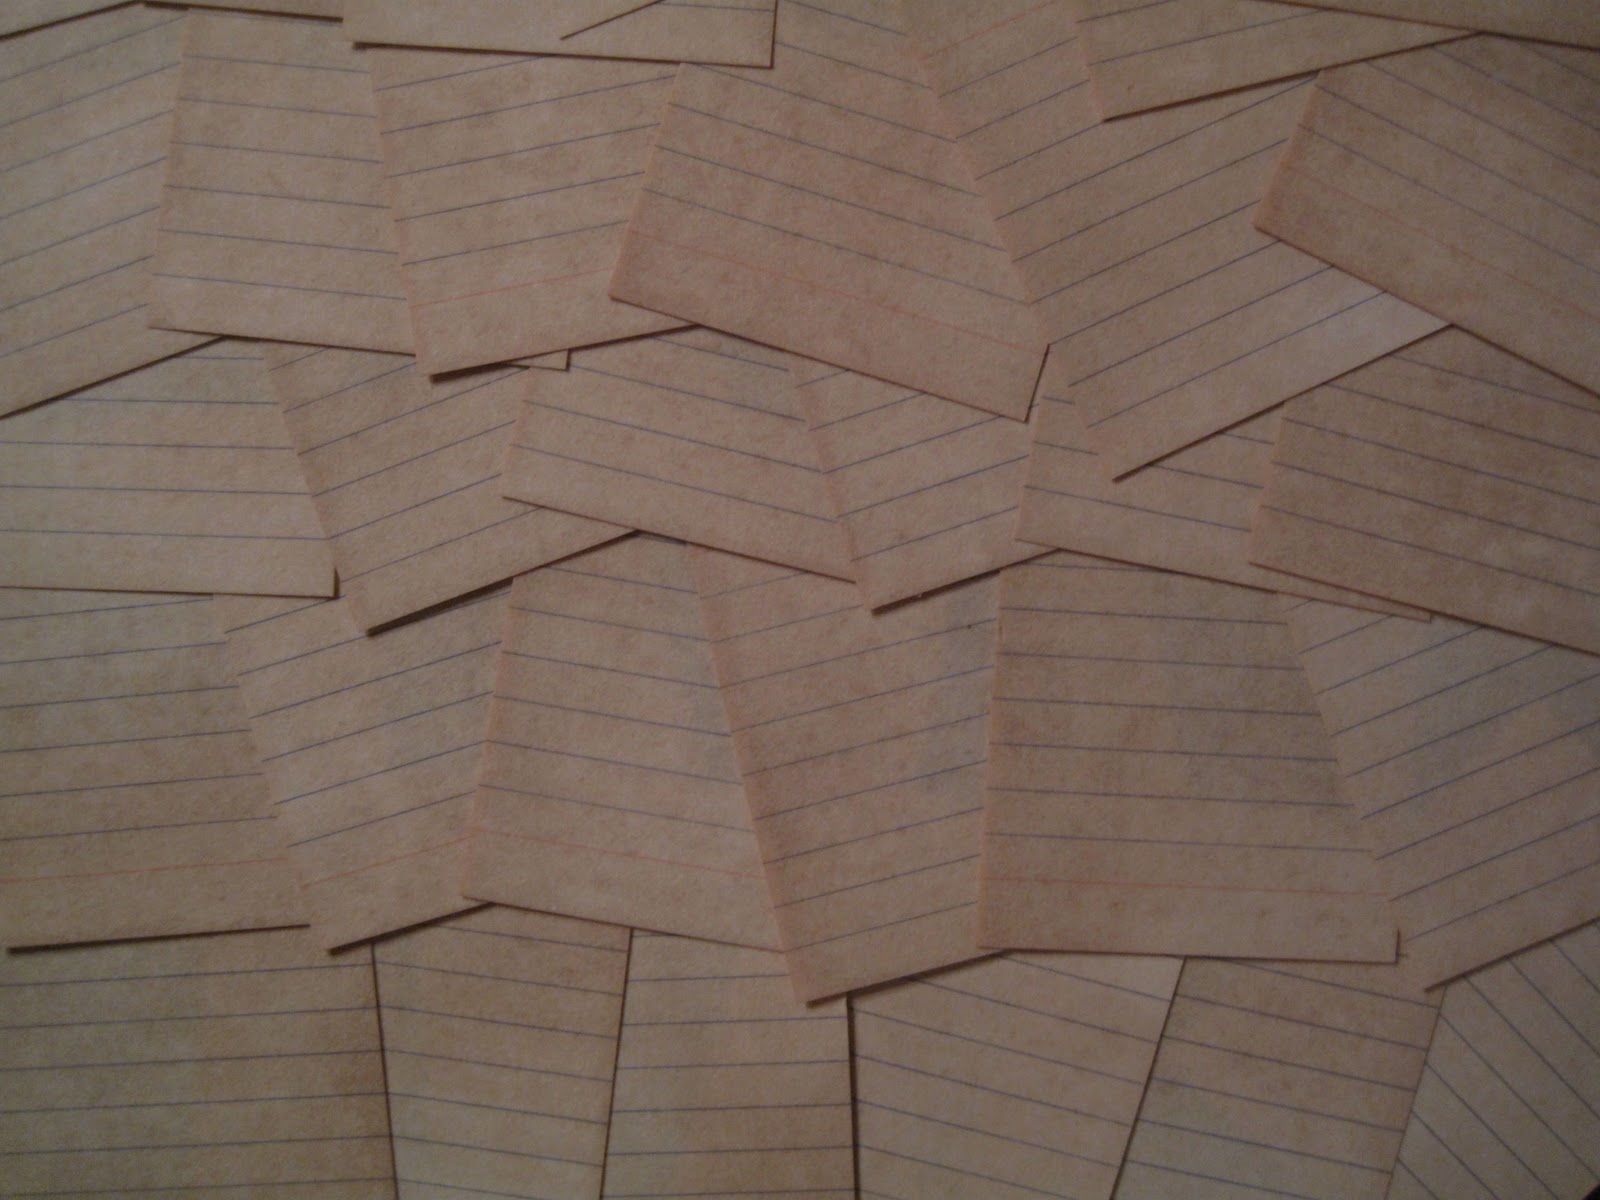
Gather up a 9x13 glass baking dish, a few tea bags (the darker the better), note cards or card stock (I used 2x3 lined note cards), and 1 very hot pot of water.

The Stash Vanilla nut Creme Tea even gave the tags a light vanilla scent. It was a cute touch.


Open the tea bags and place them in the dish. Pour the hot water over the top filling almost to the top.

Let the tea steep for at least 5 minutes. You want the tea water nice and dark.

Place the note cards in to the tea. I tossed in a couple at a time and pushed each one to the bottom making sure it was completely submerged. If you throw in stacks they stick together and wont completely stain on each side.

Here are 100 tags soaking. I let them soak for about 30 minutes. Vary time based on how dark you'd like them.

I took them out and laid them on a towel. I folded the towel over and blotted the excess water off. You could also use paper towels.

Double use here, I used my cooling racks for cookies to lay out the cards. Overlapping is ok, they'll dry in a few hours. I let them be and they were completely dry by the next morning!

Pretty vintage looking cards. If they curl, you can leave them or iron them flat if you like. I used a silver sharpie to write out the tags, punched holes and attached them to my scarves with string!

Fun and easy! Enjoy!

Sunday, December 19, 2010

totally, absolutely love!

I was making my daily visit to Miss Elsie and came across this beautiful photo:


If she loves it, of course I would. Katie's DIY Glitter Bangles are absolutely beautiful. They're totally must have stocking stuffers I hope to get finished up this week! Visit Katie and check out her collection of holiday DIY posts for December. 18 in all by Christmas Eve!


Craft fair was AWESOME today! Super tired today (been up since yesterday) and just winding down before an early night to bed. Will share everything tomorrow, including sales AND finds!


Hope everyone has a wonderful week!

Monday, November 8, 2010

Project Heaven!

With the craft fair nearing in about a month, I've been hard at work on my projects. The hard thing? I keep coming up with new ideas. What do I do about this? I need some sort of plan written out, don't I? I've never done this before so I'd love input.

This is literally only half the bags of yarn I've collected since September. Mind you, these are half yarn, half completed or almost completed projects. I'm running out of storage space. I need a craft room, stat!

I absolutely love these. Cotton wash cloth sets. I don't think I'll ever buy wash cloths or dishtowels again when I can make such beautiful pieces that are completely functional.

Coffee cozies have been a HUGE hit at work. I've already sold my first cozy, which I was totally excited about, and I have a ton of these to put together still. I even sent a few to Ashley in her gift box last week.

I couldn't find my "demo" cup from Starbucks I'd kept, so I slipped it on my travel mug for the picture. When I went to Portland for sis-in-laws baby shower, my mom and I used our cozies on our Starbucks cups throughout our trip. People stared. I'll take that as a compliment!

This all started with the dream to have a baby blanket making business. If you really just try saying that on a whim, it usually comes out baby making business... Yikes. They're beautiful, plush and soft. My sis-in-law loved hers.

Yellow! So cute! I really hope these find good homes. Should I make a few more blankets? Or would the smaller stuff be a better eye catcher? I'm not sure.

Scarves galore. I found a killer pattern for neck warmers (on the left). Just trying to find the perfect buttons to adorn them. And the ruffled scarf (on the right). Oh my. I also sent one of these to Ashley in her gift box, but her's is way cuter than this one!

I would absolutely love feedback on what works, what doesn't work for these things. I'm new to the world of craft fairs and selling handy work.

Today is a house day. We've got a garage to clean out and organize. Looking forward to a full day of work and a nice relaxing evening to work on my projects. Wish me luck!

A Crafty Soiree
I've also linked up with the lovely Malia!

Tuesday, November 2, 2010

I've turned in to an old lady.

My husband said something the other day to a friend of ours, something along the lines of 'married a good looking girl almost 10 years younger than myself... she wants a hobby... and takes up crocheting'.

I've turned in to an old lady.

I have to admit, we find this really humorous. It was something my grandmother taught me as a child. My mom-in-law helped me revive the skill last year over our Thanksgiving visit and here I am a year later, picking the hook back up and crocheting my head off.

I've decided to venture in to the  possibility of a mini side business and a coworker jumped on board. we've been crocheting like crazy getting ready for our first craft fair in December. Today we're headed off island to search for more inspiration.

Not that I need more inspiration. You should see how many skeins of yarn I managed to collect over the last month. Makes for a lot of adorable things I can't wait to share :)

Monday, October 25, 2010

Doing it the right way: The kitchen cabinet edition.

Let me tell you a long drawn out story before I get to the heart of this post. I know, you're just thrilled.

I moved in to my beloved home in January of 2008. The love of my life asked if I would like to live with him, it helped us both financially, and I was much closer to work. I gave it thought over a couple of months and in the month of January moved in my things from my apartment 30 minutes away and was officially a resident.

My dearest boyfriend at the time had owned our house for 9 years. In those 9 years he'd done nothing to the place to change the atmosphere. There was nothing wrong with the house, it was just outdated. He was more than up for a change and I helped him make that happen.

The cabinets were painted the very faintest green, with a sage trim. Sure, maybe great for when I was 12, but not so much now. I repainted them antique white with black trim. Suited my taste at the time (and I was hardly that handy when it came to design). Just over 6 months later after I had gotten my debt paid off, we were living debt free (house and cars excluded) and ready to invest in remodeling the house. This is where my first blog I ever followed came in. She painted her kitchen cabinets black. I LOVED black. So I went for it. Painted them black, and threw the doors back on with stainless hardware.

Great for the first bit, not great six months later. I've sat on them until now. I hated the paint job, the finish, the color. Everything. They literally sucked.

WOW. I told you it would be long winded. Last month I realized I have ten thousand and one projects started but none of them completed. I had to choose something I could do on my own (almost) start to finish. Kitchen cabinets it was.

I was blog surfing and came across a link that led me to Sunset for a tutuorial on making window valances of some sort. I poked around on the site and came across How to give your cabinets a makeover. SOLD!

If you want to repaint your cabinets, read this and soak it up. When they say your kitchen will NOT be of use to your daily life, they're serious. No cooking. I lived off cupcakes and coffee for three days. It was bliss. They say to set aside 4 days. This literally took me 4 days. No joke.

So here's what I did:

1. Empty every cupboard and drawer. Make a huge mess of the rest of your house by placing the contents throughout every available room. When I ate cereal, I fetched the bowl from the dining room table and the silverware from the couch. Empty it, seriously. The first time we "did it right", we didn't empty them. Then I had to wash every.damn.dish. They were covered in dust and paint flecks.

2. Sanded any and all imperfections I could find. There were drips from the previous 3 paint jobs. Sand away baby. Keep the vacuum handy. It's so much easier to vacuum up in stages rather than going back to after it all.

3. Clean the cabinets with TSP Solution. It comes in a spray bottle for $5. I found it in the paint section at Home Depot. It was down the same aisle as the wood glue and other random crap, like GIANT buckets of Zinsser Primer and so on. This takes all grime off the cabinets and also helps dull any sort of glossy finish. It helps avoid all over sanding and ensures your cabinets are perfectly clean for primer and paint. This stuff stinks. I'd reccommed wearing a mask when spraying it, keeping the room well ventalated and pets away. It makes you cough like no other. Wear gloves. It makes your hands dry and itchy. It's a no-wash solution, so there is no need to soap down the cabinets afterward.


4. Prime your cabinets. Be sure to use a good quality primer. If you have stains, be sure to get something that blocks stains. They will bleed through everything. Primer and paint. I chose not to get the stain blocking primer and have one spot that continues to bleed through. Thankfully it's inside a low cabinet and my baking sheets sit of top of it. I used a Zinsser Primer that cost about $18 for the gallon. Zinsser is the favorite primer of Shannon at The House Creative. She does great work and speaks highly of the brand, so I went with it. Day 1 I primed all of the cabinets. Inside and out and allowed to dry over night. Day 2, I primed in the morning a second coat. The better coat of primer you have, the less paint you have to use, meaning less expensive project.

5. Start painting! Use good quality paint in a semi gloss finish. I used my good old Ralph Lauren in Sisal. Home Depot doesn't carry Ralph Lauren paint any longer (booooo!), but still have their color codes in the computer and can mix them with Martha Stewart (recommended by me) or Behr (not recommended by me for interior). I started painting the evening of Day 2.  I finished half of the outside of the cabinets and called it a day after 13 hours of work. Day 3 was a long one. I had to paint the inside and outside of all the cabinets, including cutting in all of the edges. This was the biggest pain in the ass. I painted the inside of all of the cabinets because they desperately needed it. I did two coats on the upper cabinets as some of them will be left as open concept shelving. Two coats on the inside certainly isn't required if you're only looking to "clean them up". Day 4 was my third 13-14 hour day. My body was sore like I'd just run 8 miles up hill. Man, what a workout. I put the second coat on the everything that needed it, and a third in places along the trim I felt looked a little funny. It's so important to give your paint 24 hours dry time between coats! This allows adequate drying and avoids any sort of soft layers, prevents dust from collecting and keeps any finger prints away that may want to leave their mark.

6. Put everything back! I gave two days dry time before I put all of my stuff away. I was able to do this because Husband was out of town for the week training. Otherwise I would have felt a little more rushed. He's not one to like sitting in chaos and clutter. I however don't mind that much when I know I'm in the middle of something.

Steps I haven't covered are the doors and drawers. I don't have either of those done yet. The link provided up top will give you instructions on those. Follow them to the letter friends! I promis it will be worth it. We have 6 drawers total that need painting, and we plan to build new doors for the cabinets to give them a face lift. They would have been done at this point, but with the basement flooding, it put a that plan on hold.

If you're still here, thank for sticking through this hugely word heavy post! This was a great experience, even with the long hours I put it. I absolutely love how my cabinets turned out and I get to admire my dedication and handy work every day.

To my blog friend, Mrs. D over at The Pink Lemonade Blog; I'm so sorry your recent cabinet update is failing you. I sure hope this helps! If I could fly to Virginia to help you with the project again, I would! But know your cabinets are the post that helped me find my way over to your little corner of the world and I still think they're fabulous.

Saturday, October 23, 2010

a bouncing baby boy!

I don't think I've mentioned on here before that my husband and I will be an uncle and aunt for the very first time ever in January. Husband's older brother and his wife are expecting their first child together, a bouncing baby boy, and we couldn't be more thrilled!

This will be the first grandchild for either side of our families. I should mention that we do in fact have a nephew in the family and he's one of the coolest kids you'll ever meet. Q (we really do call him this) is my sister-in-law's son. I'm sure to him we're just us, not really an aunt and uncle, but if he wanted to call us his aunt and uncle, we'd sure take it! No matter how he looks at us, we still love him to death. I mean, he taught me how to play Guitar Hero. And then on the way home from their house, we stopped by the closest Walmart to pick it up for ourselves! That's how cool of a kid he is.

We're excited about the newest addition to the family, and I hope Q is excited to be a big brother! Today is my sister-in-law's baby shower in Portland, and this is in fact where I am at this very moment. My mom and I left yesterday for the 5 hour drive two spend two nights away in Oregon. I couldn't share my gifts for her and the baby until now, because I know she reads my blog, so I waited until today.

The first two sleepers I just absolutely adore. The owls and the stripes just kill me. I'd really just like to keep them for myself so I can stare at their miniature cuteness when I need a pick-me-up. Impractical? Probably. So I'll give them to baby S.


The second two outfits I bought in a larger size. We found out he was a boy during the summer, so I did the math on my fingers and bought these in the size he'd be during the summer of 2011. Can't wait to see little chubby legs sticking out of his jean shorts!

I think onesies are one of the best inventions in the world. I also happen to love stripes. So I picked up all the boy onesies I could find locally in a striped fashion. Love them!


And last but not least is this darling, silky little thing. This is a blanket made with love by Auntie Cassie for baby S. Yes, you heard that right. I made this! I was absolutely thrilled with how it came out. It's really beatiful yarn and so plush and soft.

I really hope my sister-in-law loves it.

I hope my mom-in-law loves it to! I told her I had made a blanket for the baby, and I know she's been waiting to see the finished product.

I'll post pictures of the shower later this week if sis-in-law is ok with me sharing :) Hope everyone is having a great weekend!