Showing posts with label Home Renovations. Show all posts

Friday, January 20, 2012

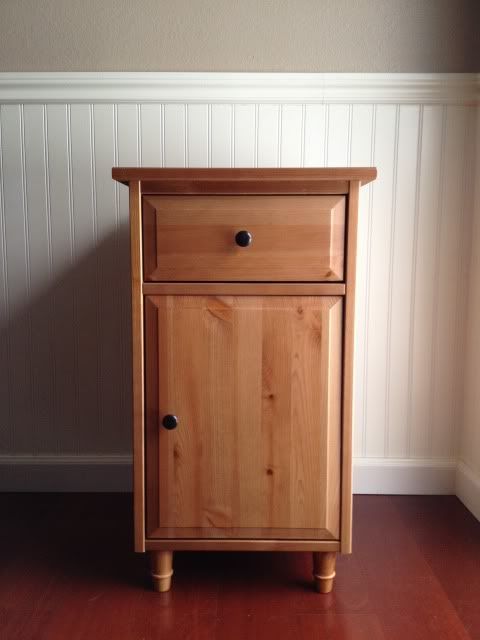
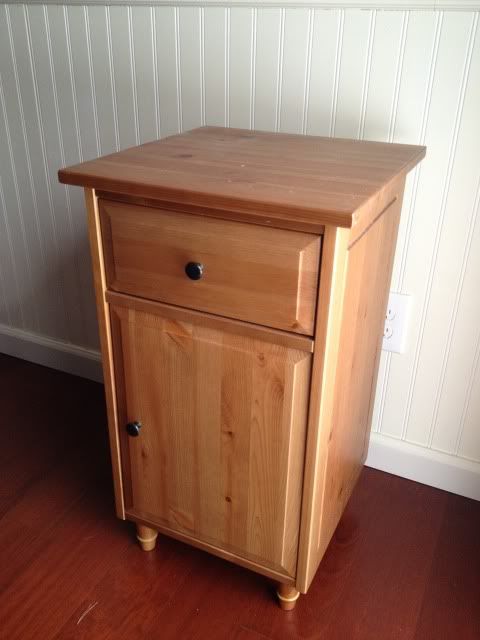
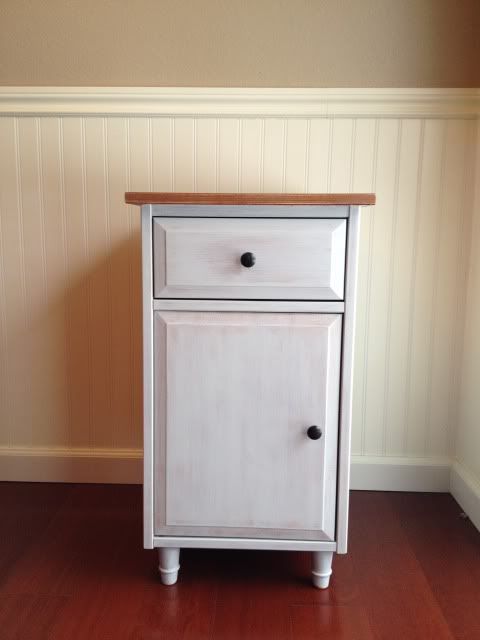
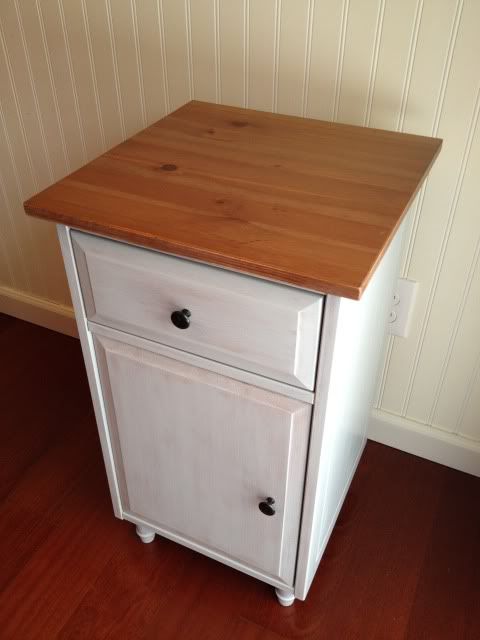
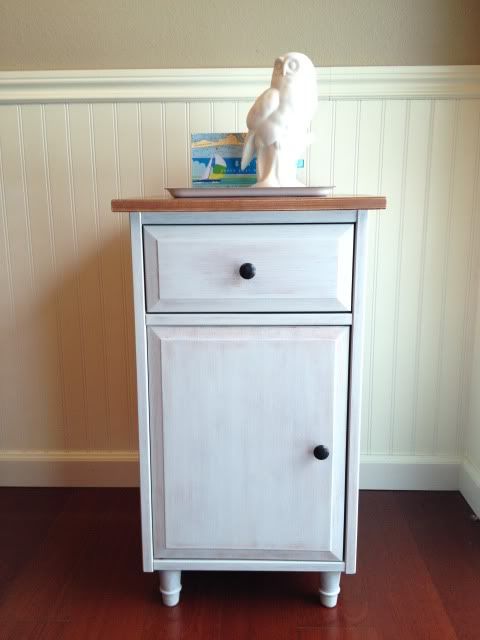
IKEA Hemnes Night Stand Makeover

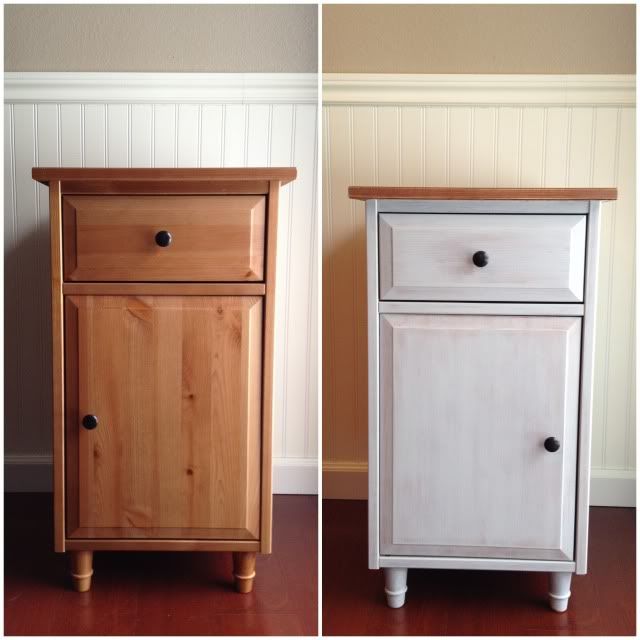
I found this on Pinterest and freaked out a little. I liked it so much, I thought I could try my hand at updating my four year old Hemnes night stands from IKEA.


This was a $6 makeover. $5 for a tiny can of stain and $1 for the two foam brushes. I could have used stain and foam brushes that I already had, but I'm pretty sure the stain is in the garage is either a. frozen or b. dried out because I didn't put the lid back on it all the way. And the foam brushes? I know I have some, I just figured it was easier to buy them rather than rummaging through the house. The paint I had on hand.

Before:


After:


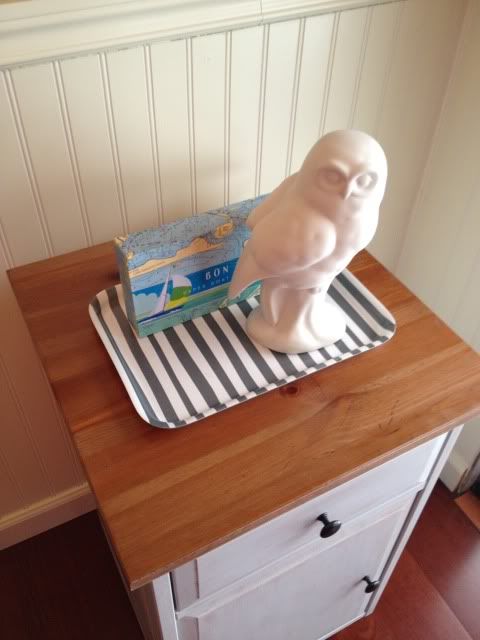
And now for staged photos with random props gathered from my house:

Bon Voyage Note Cards - Gift from Ashley
White Ceramic Owl - Gift from my mother
Gray & White Tray - Ikea circa 2010

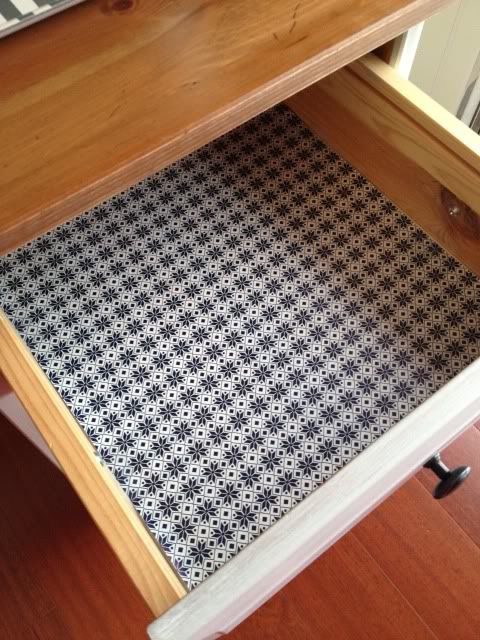
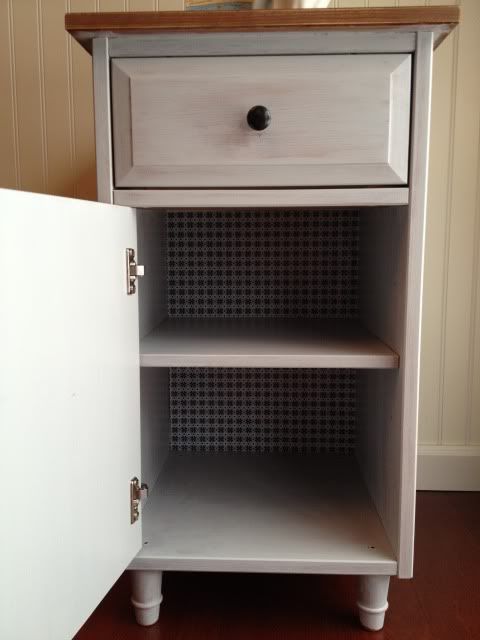
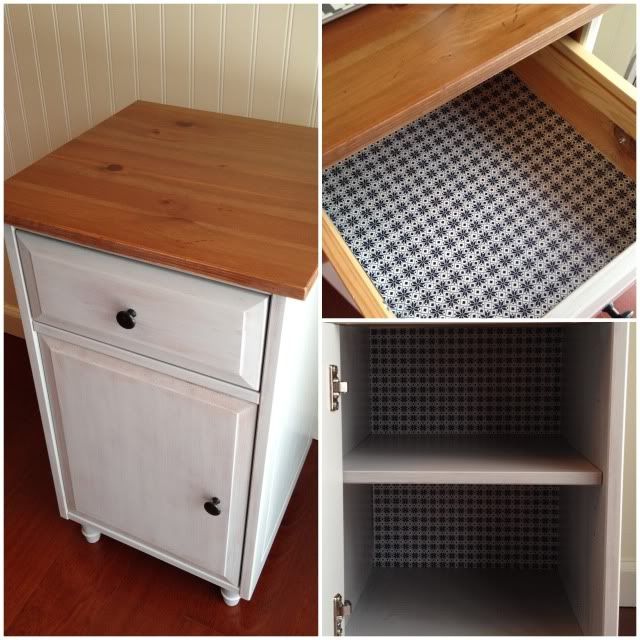
And check me out. Pizazzing up the insides!

Wrapping Paper cut to size - IKEA circa 2010

You were pretty cute before little thing, but you're fitting the beach cottage chic of my bedroom even better now!


Stain: Minwax Red Oak
Paint: Martha Stewart Driftwood
Both available at Home Depot.

If you're thinking of tackling a small project like this, it's easy! You could get away with purchasing a tester bottle of the Martha Stewart paint for around $3, a small can of stain for $5 and a couple foam brushes (one for the paint, one for the stain). I applied two less than perfect coats of paint with a large foam brush and three coats of stain. I wanted a worn, shabby look, so in between coats I sanded a bit with an ultra fine sanding block I had on hand and rubbed a little stain along the edges of the drawer and door. 

And that's that! Hope you enjoyed!

Monday, October 25, 2010

Doing it the right way: The kitchen cabinet edition.

Let me tell you a long drawn out story before I get to the heart of this post. I know, you're just thrilled.

I moved in to my beloved home in January of 2008. The love of my life asked if I would like to live with him, it helped us both financially, and I was much closer to work. I gave it thought over a couple of months and in the month of January moved in my things from my apartment 30 minutes away and was officially a resident.

My dearest boyfriend at the time had owned our house for 9 years. In those 9 years he'd done nothing to the place to change the atmosphere. There was nothing wrong with the house, it was just outdated. He was more than up for a change and I helped him make that happen.

The cabinets were painted the very faintest green, with a sage trim. Sure, maybe great for when I was 12, but not so much now. I repainted them antique white with black trim. Suited my taste at the time (and I was hardly that handy when it came to design). Just over 6 months later after I had gotten my debt paid off, we were living debt free (house and cars excluded) and ready to invest in remodeling the house. This is where my first blog I ever followed came in. She painted her kitchen cabinets black. I LOVED black. So I went for it. Painted them black, and threw the doors back on with stainless hardware.

Great for the first bit, not great six months later. I've sat on them until now. I hated the paint job, the finish, the color. Everything. They literally sucked.

WOW. I told you it would be long winded. Last month I realized I have ten thousand and one projects started but none of them completed. I had to choose something I could do on my own (almost) start to finish. Kitchen cabinets it was.

I was blog surfing and came across a link that led me to Sunset for a tutuorial on making window valances of some sort. I poked around on the site and came across How to give your cabinets a makeover. SOLD!

If you want to repaint your cabinets, read this and soak it up. When they say your kitchen will NOT be of use to your daily life, they're serious. No cooking. I lived off cupcakes and coffee for three days. It was bliss. They say to set aside 4 days. This literally took me 4 days. No joke.

So here's what I did:

1. Empty every cupboard and drawer. Make a huge mess of the rest of your house by placing the contents throughout every available room. When I ate cereal, I fetched the bowl from the dining room table and the silverware from the couch. Empty it, seriously. The first time we "did it right", we didn't empty them. Then I had to wash every.damn.dish. They were covered in dust and paint flecks.

2. Sanded any and all imperfections I could find. There were drips from the previous 3 paint jobs. Sand away baby. Keep the vacuum handy. It's so much easier to vacuum up in stages rather than going back to after it all.

3. Clean the cabinets with TSP Solution. It comes in a spray bottle for $5. I found it in the paint section at Home Depot. It was down the same aisle as the wood glue and other random crap, like GIANT buckets of Zinsser Primer and so on. This takes all grime off the cabinets and also helps dull any sort of glossy finish. It helps avoid all over sanding and ensures your cabinets are perfectly clean for primer and paint. This stuff stinks. I'd reccommed wearing a mask when spraying it, keeping the room well ventalated and pets away. It makes you cough like no other. Wear gloves. It makes your hands dry and itchy. It's a no-wash solution, so there is no need to soap down the cabinets afterward.


4. Prime your cabinets. Be sure to use a good quality primer. If you have stains, be sure to get something that blocks stains. They will bleed through everything. Primer and paint. I chose not to get the stain blocking primer and have one spot that continues to bleed through. Thankfully it's inside a low cabinet and my baking sheets sit of top of it. I used a Zinsser Primer that cost about $18 for the gallon. Zinsser is the favorite primer of Shannon at The House Creative. She does great work and speaks highly of the brand, so I went with it. Day 1 I primed all of the cabinets. Inside and out and allowed to dry over night. Day 2, I primed in the morning a second coat. The better coat of primer you have, the less paint you have to use, meaning less expensive project.

5. Start painting! Use good quality paint in a semi gloss finish. I used my good old Ralph Lauren in Sisal. Home Depot doesn't carry Ralph Lauren paint any longer (booooo!), but still have their color codes in the computer and can mix them with Martha Stewart (recommended by me) or Behr (not recommended by me for interior). I started painting the evening of Day 2.  I finished half of the outside of the cabinets and called it a day after 13 hours of work. Day 3 was a long one. I had to paint the inside and outside of all the cabinets, including cutting in all of the edges. This was the biggest pain in the ass. I painted the inside of all of the cabinets because they desperately needed it. I did two coats on the upper cabinets as some of them will be left as open concept shelving. Two coats on the inside certainly isn't required if you're only looking to "clean them up". Day 4 was my third 13-14 hour day. My body was sore like I'd just run 8 miles up hill. Man, what a workout. I put the second coat on the everything that needed it, and a third in places along the trim I felt looked a little funny. It's so important to give your paint 24 hours dry time between coats! This allows adequate drying and avoids any sort of soft layers, prevents dust from collecting and keeps any finger prints away that may want to leave their mark.

6. Put everything back! I gave two days dry time before I put all of my stuff away. I was able to do this because Husband was out of town for the week training. Otherwise I would have felt a little more rushed. He's not one to like sitting in chaos and clutter. I however don't mind that much when I know I'm in the middle of something.

Steps I haven't covered are the doors and drawers. I don't have either of those done yet. The link provided up top will give you instructions on those. Follow them to the letter friends! I promis it will be worth it. We have 6 drawers total that need painting, and we plan to build new doors for the cabinets to give them a face lift. They would have been done at this point, but with the basement flooding, it put a that plan on hold.

If you're still here, thank for sticking through this hugely word heavy post! This was a great experience, even with the long hours I put it. I absolutely love how my cabinets turned out and I get to admire my dedication and handy work every day.

To my blog friend, Mrs. D over at The Pink Lemonade Blog; I'm so sorry your recent cabinet update is failing you. I sure hope this helps! If I could fly to Virginia to help you with the project again, I would! But know your cabinets are the post that helped me find my way over to your little corner of the world and I still think they're fabulous.

Monday, October 18, 2010

It wasn't the first time.

When the basement flooded, it put the last of the kitchen & dining room project on hold. The dealings with our insurance company has been a back and forth issue, but thankfully I've managed to keep my head in it all.

The downstairs is now dry. Many of the walls have the bottom two feet removed and insulation pulled out. The contractor has been to the house and given the estimate for repairing the walls. We've chosen to do half the work ourselves which will give us a check from the insurance company for what we choose to not use the contractor for. Insurance has chosen not to have the flooring in the laundry and bathroom replaced, so the money we will receive will cover the cost of flooring for both of those rooms and replacement of the vanity, toilet and mirror. If we're thrifty enough with our choices, possibly the deductable too.

As we get the basement finished up, I just can't wait to share the progress I've made in the kitchen. It wasn't the first time I've painted the cabinets since moving in here three years ago. It's the third time to be exact. This is the first time I really educated myself and made sure to do it right.


I had seen a great kitchen on my first blog I ever followed a few years back. She had repainted her cabinets in her tiny condo black and added stainless hardware. I was in love. Black is my favorite color and I thought I'd totally love my cabinets. After painting them in 2008, they lost their charm rather quickly. I finally found the motivation to tackle the kitchen and dining room project on my own and don't miss the black cabinets one bit.

I'll give one sneak peek before the entire project is finished. Please don't mind the huge mess on the counters.


I think it looks so much better already. Can't wait to share the finished project soon!

Wednesday, October 6, 2010

I should be sleeping.

By the sounds observed through the floor, you'd perhaps believe the person installing the water heater has no idea what they're doing.

I'm locked upstairs in the bedroom with two small dogs who are less than pleased to be spending time with me. I am probably 100% correct when I say the man installing the water heater might not want anything to do with our dogs.

We should both be sleeping for work, but I guess this is the sacrifice you make when you've gone without running water for two days. But really, I've thought it was rather cool that my husband fills the back of our toilet via bucket. Thanks neighbors for sharing the water from your hose!

I don't think there will be hot water ready for me today. Good thing I showered before bed last night and I look halfway decent when I woke up. I'll probably just wash my face and brush my teeth at work and look forward to a 3:00am shower.

But it's all coming along! Once we have the water back on, the rest will be really easy. As of now, we don't use the downstairs except for laundry anyway and since that's all clean (thank you, Jeremy) it will be easy to be patient until the rest is done. Wonder when the demo crew will be here to tear out the drywall and insulation? Good question.

Hope everyone is enjoying their week. It's already half way over!

Tuesday, October 5, 2010

an update of sorts

We still have fans and a dehumidifier going in the basement today. It was still wet and mold has started showing on some of the walls. Tomorrow the cleaning company will be back to take down the sheetrock and insulation from the wall between the bathroom and bedroom.

The water heater installation was pushed off from today to tomorrow morning first thing. The tech for our area called out sick today. We're lucky enough to have good friends in town that allow us to use their shower, washer and dryer. I'm hoping I'll have hot water by the time I have to be up for work tomorrow, but I think that's not going to happen.

The insurance company has agreed to cover our damages at this time. As long as they sign off on the summary from each of the companies we are working with everything will be replaced. This includes things we already had the intention of replacing. The flooring company will be replacing our carpet pad, the existing carpet is fine and will be placed back over the top. We'll have new flooring installed in the laundry room and bathroom and they've said as long as we purchase the new sink and toilet they'll install that for us as well. This is great news! If all goes well, we will only be responsible for paint and interior doors. This big mess may mean the entire downstairs remodel will be done at minimal cost to us and done professionally.

Because the sheet rock and insulation will be coming out of a few walls, we'll have a contractor coming in to replace them. I'm hoping this whole process takes no more than a month and by the time it's finished we'll be able to move in to our new bedroom! I tell you, staying positive in a situation like this is more likely to create a blessing in the end.

When this mess comes to a close, we'll finish up the kitchen. I'm so close to being done. Just doors and drawers and we'll be done! It's looked better than ever before.

I'll keep the updates coming!

Monday, October 4, 2010

a life of 8-15 years

Ah, and I was making such progress.

Here are a few of the things I've learned this weekend.

I'm a hoarder. I have A LOT of stuff. EVERYWHERE. I collect stuff but never quite do anything with it because the house isn't "finished" yet. I've come to realize I need to stop collecting stuff.

Water heaters have a life of 8-15 years.

Our water heater has gone to that big water heater heaven in the sky, but not before seeping it's contents all over our basement. I went down to do laundry last night and discovered a pond. It wasn't as pretty as some I've seen, and I think they look much  better in back yards. Just my honest opinion there.

We aren't sure how long it's been leaking or how much damage we're looking at, but the restoration service has arrived and they're starting to paint the picture for us. We have the new carpet and pad that's soaked. The water ran under the wall from the half bath in to the laundry room, and also under the wall in to the master bedroom. It's evident where we have no doors that water has inflitrated our drywall and studs. We haven't yet had the chance to take a look in the crawl space under the house to see if there is any standing water there.
I'm praying this will not be a financial burden bigger than we can handle right now. I don't feel anxious or stressed about it, and I hope the insurance company finds favor in our situation and helps us get this cleaned up with little expense on our end.

Until then, I'll sit in our bedroom upstairs and contain two naughty dogs that should absolutely be visited by Caesar Millan.

I'm suddenly happy that the plans for the master were haulted over the summer. I'd have about lost myself if all that work had beed flooded. Wish us luck!

Tuesday, July 6, 2010

The Bedroom: In Color

I've thought long and hard on my accent color for my new bedroom, and finally came to a decision.

Given we're going for beach cottage-meets modern-meets vintage, I thought a shade of blue would be totally appropriate. Here's the kicker; I copied my mother. The room will still remain white with natural wood, white-washed and black furniture. I'll just have to figure out how to incorporate my new blue color.

She picked up her duvet set, in peacock blue, from HSN. It's Nate Berkus and you can find it here.

After further review of the Nate Berkus line, I found plenty that I loved. Will I pay the price for what  I love? Probably not. But I'm sure I'll find a way to add to my already long project list.


We've previously decided on this headboard:

However, I came across this one - and I tell you it has us thinking.


We're still searching for a reading chair for husband. This is why I have an obsession with Craigslist wingback chairs, even though I haven't picked one up yet.

Now we're thinking we really love this little sofa.


These little pillows were found under the Costal Living collection. They've also found their way on to my list for the bedroom.


I think this silk throw will look nice over white bedding. It's also on my must purchase list.


Though I wish we were already to this step in the bedroom renovation, we're not. Work is slow going, as tear out of the bathroom & laundry is next. Today however, we're going to get to work on finishing up our end tables we started last month. We have one to finish sand & stain, and another to build (pieces are cut). I'm also going to put together the plans for my bench that will go at the end of the bed and painted out in a nice blue color.

Hope everyone had a great weekend!

Friday, July 2, 2010

Dear Craigslist,

I WISH YOU DIDN'T EXIST.

Ok, I'm sorry. I don't mean that. I just mean, that when I look at your site I just want to bring home so many pieces of furniture to fix up and place in my home. And I know that right at this moment I don't have the room, and way too many projects backed up, and not enough time. But seriously.


I need you, corner armoire. I need you for my laundry room. I need to paint you white and add pretty wallpaper to the inside so I can store blankets, sheets and towels. And maybe my laundry detergent.


And I really, really want you little tables. I have big dreams for you.


Oh antique record player that works, how I can just imagine you painted a bright shade of green. You'd be so cute in the office that will exist... one day.


Hello little reading chairs. I think you'd look nice recovered, one placed in the bedroom and the other in the office. But husband said no.


What a pretty  mirror. It would look perfect above my bed.


Oh little headboard, you almost have me conviced I don't need to build a wood one.


And sadly, the buffet that I loved so much I can no longer find. The last email I got said it was still available but I promised husband I'd find another one later when I got to the dining room. But look at all this stuff! I could find so much to do with it.

I'm sorry Craigslist, I really do love you.

Friday, June 18, 2010

Beadboard, anyone?

I'm sitting here eating a nutritious breakfast at 5:45pm, and realizing now that I haven't uploaded as many renovation photos as I had originally thought. But I can give you a sneak peek of the beadboard, for now.

Since, you know, I promised that by Wednesday.


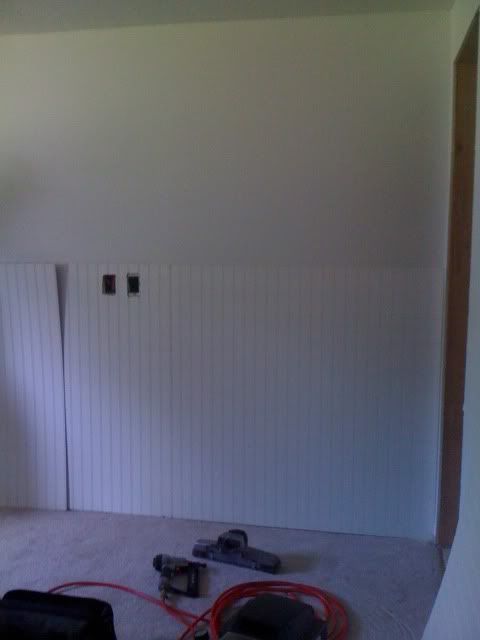
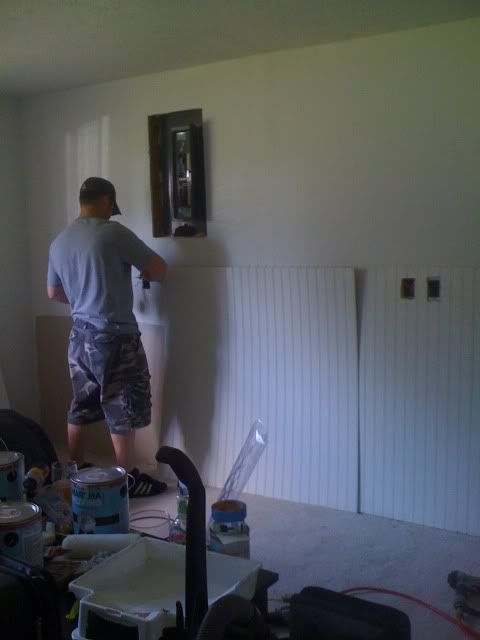
Here you can see the Martha Stewart "Lamb". It's a really pretty white with just a touch of grey. And I tell you what, beadboard is a pain in the ass to install. Especially when your walls are from 1976 and they were too wild to be built straight then.


Where handsome husband is standing, you can see my lovely breaker box. It had a little wooden door on it that we took off. This is actually where the head of the bed will go. We'll trim out the inside edges of the box to hide the insulation and throw up a picture or something. Shouldn't be a problem. I hope. You can also see the old wall color.

Funny story about the old wall color. That's the color I chose two years ago, when this room was going to be the "den". And I later realized this was almost the same original color of the house I painted over UPSTAIRS. What's wrong with me?


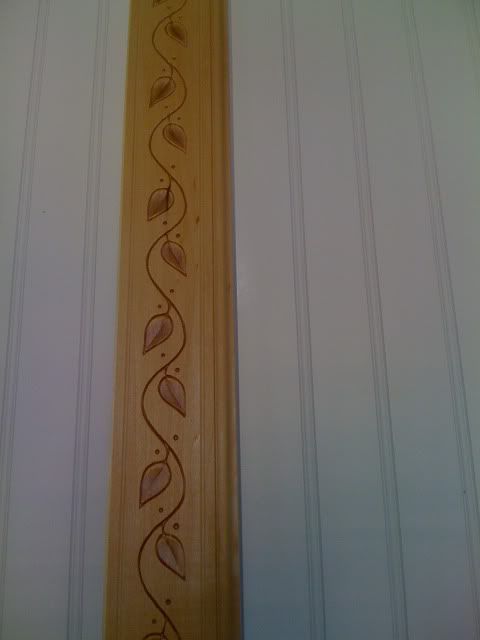
This is the trim we chose for the top of the beadboard. It will be painted out white, to match. We really liked the pattern. It will be much more subtle once it's up on the whole wall and I think will add a little character. I've actually got a coat of paint on the beadboard now, just no pictures yet. It looks 10 times better than even these photos. Each little step gets me more excited for the next.


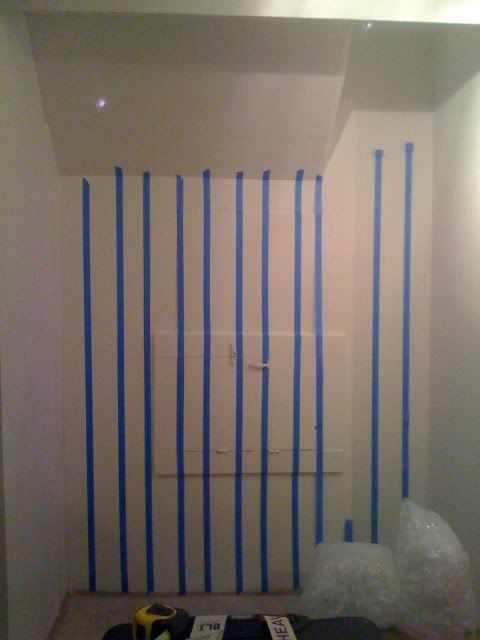
Here is one of the two closests in the room. That's the crawlspace door, and the weird part up top are the stairs leading to the upper part of our split level home. I'm painting the backs out with stripes and boy is taping a tedious job. That's why the last four pieces of tape are just kind of hanging out. I've chosen a light grey for the stripes, and they should add just enough of a fun pop when the closets are open.


The stripes will be "Driftwood Gray". I'm also using the Driftwood in the laundry room. Either in wide horizontal stripes or solid. The room only holds the washer and dryer for now and needs a little help since it's a decent sized room at 8'x8'. I think we'll be adding a dresser that will double as a folding table and possibly a craft/sewing table of some sort. Space allowing, of course.

That's it for now. Tuesday is another big day of work downstairs for us and I'll have more photos to update then.

Friday, June 11, 2010

I'm workin' it.

The paint roller, that is.

Master bedroom renovations are well underway. It's going to take longer than the week I was hoping to complete it in, but this week will give us a huge head start.

The master is the whole lower level of our house. It has the bedroom with two closets, a half bath & laundry room. The bedroom & laundry have been cleaned out, junk we've kept for whatever reason has been taken to the dump, and things that were reusable or that we chose to keep now have a new home.


Paint colors were chosen and I painted the.whole.bedroom. In one day. I spent 8 hours downstairs painting and only have a few things left to touch up for the main color. I ran out of paint, so that slowed me down.

I have been dedicated to Ralph Lauren paint from Home Depot, so when I found out they replaced it with Martha Stewart I was livid. Why? First, because I really like the paint and their colors. Second, I bought paint for the dining room & kitchen cabinets and haven't painted them yet. What am I supposed to do if I need more? So, yeah.

We priced and compared colors from three paint brands and ended up choosing Martha. I have to say, I really love it. I liked the color selection, the consistency of the paint was good and it covered amazingly well. I was shocked that I only had a tiny bit of touch up when it came time for the second coat, and I was painting white!

Yes, I chose white. When everyone else is trying to brighten up a space, I've brought it back to the basics. The room looks so open and bright. It gives me the opportunity to change the decor whenever I feel the need.

For the white I chose "Lamb". It looks pretty grey here, but it only has the slightest hint of grey. Of the 8 whites we looked at this was one of the least harsh. For a cool color, it still had warmth to it.

My original inspiration photos were of a crisp white & black color scheme. In the last few months it's changed in to something both husband and I have come to be very happy with. Our palette includes white, a light blue-grey and black. We're looking at beach cottage-meets modern-meets vintage. The ideas are flowing abundantly and I can't work fast enough to keep up.

I expect the entire remodel to take the rest of the month, but I hope we're at least in the bedroom by then. I'll keep the progress updated, and later tonight (since this is posting at 1:00am) I should have a few progress photos of my paint work.

Happy Friday everyone!

Saturday, March 20, 2010

Renovations: A peek inside what was once chaos

I have my days where I look around the house and I get so overwhelmed with everything there is to be done. I feel like I'm unorganized and my house is in shambles. We started renovating two years ago this May and I just don't know why we can't be finished.

I came across this picture yesterday and was definitely humbled by it. I looked at this, then looked up in to my living room and realized we have so much done around here. Our house is cozy and well maintained. We just may not have a lot of the finish work done yet. It would be wrong of me to not be thankful for everything my husband has helped me bring to light, and all of his hard work.

This picture was taken in September 2007. This was still his house, and the way it looked - blue walls, blue trim, blue couches, brown carpet - this was all here when he bought the house 9 years prior. He had been a bachelor for a long time. And when we saw this picture, I told him I could help him make a difference. And we soon did.

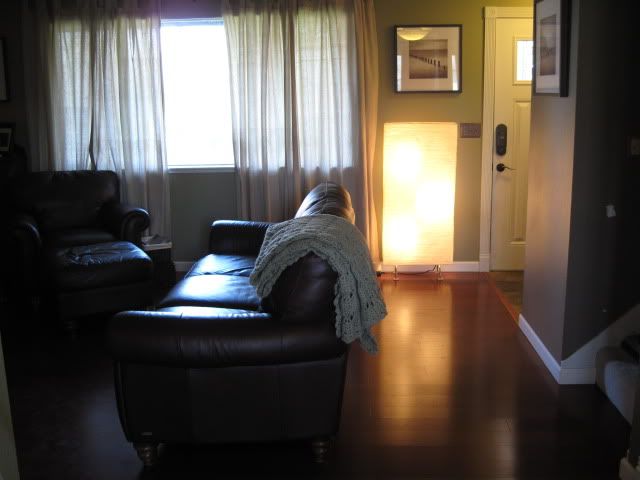
And though there was an in between to this photo and the one before, this is what it looks like today. We live in a cozy, well maintained home that we made together. If I compare the two pictures we replaced the front door, repainted, installed new slate and wood flooring, put up nice linen curtains on the window and replaced our furniture with comfortable leather. Talk about a big difference.


So sometimes when I feel like my house is a mess, or even like life is a mess - I have to take time to think everything over and just be thankful for everything I have. I am so blessed.