Showing posts with label Decor. Show all posts

Friday, January 20, 2012

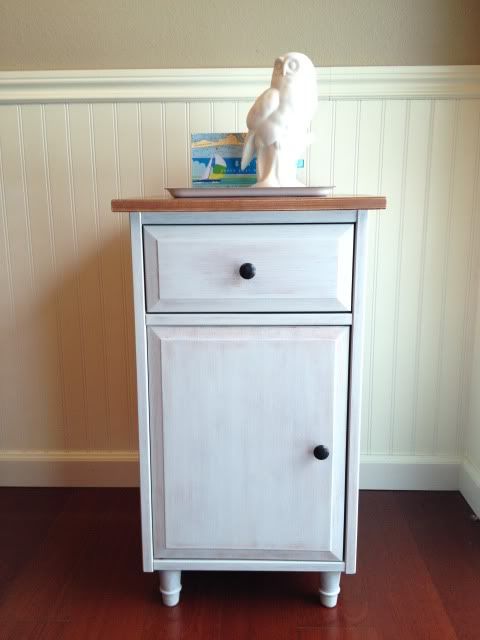
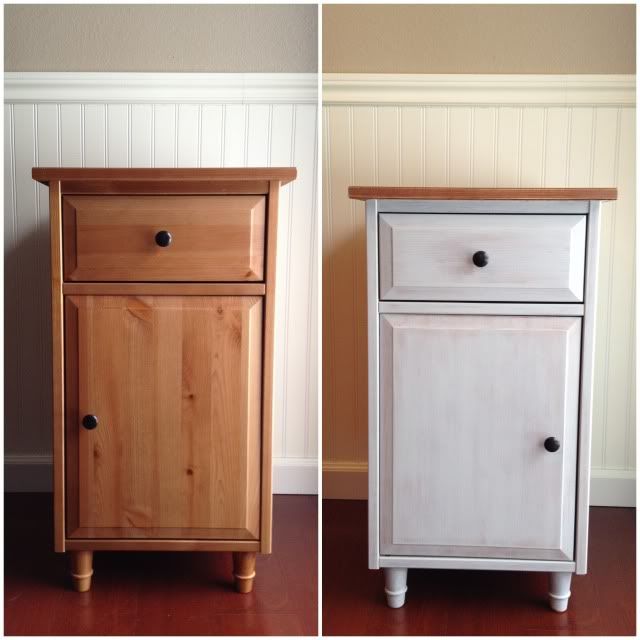
IKEA Hemnes Night Stand Makeover

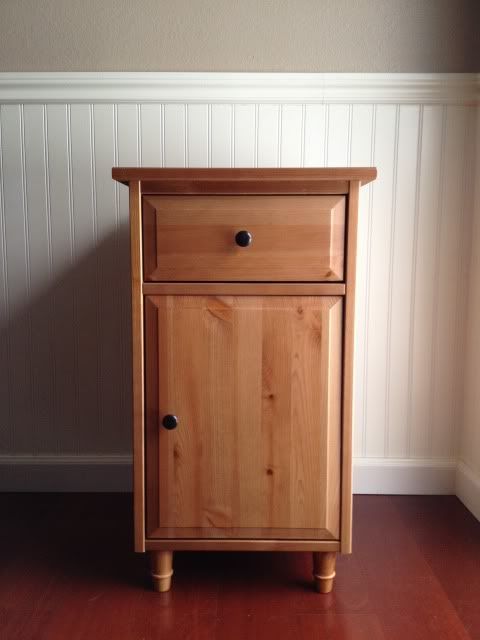
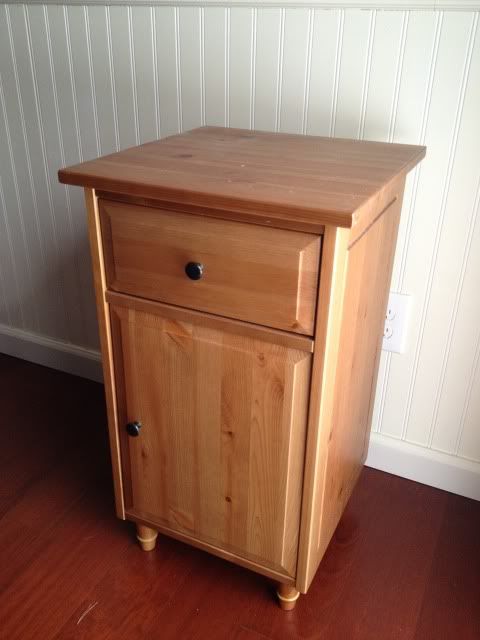
I found this on Pinterest and freaked out a little. I liked it so much, I thought I could try my hand at updating my four year old Hemnes night stands from IKEA.


This was a $6 makeover. $5 for a tiny can of stain and $1 for the two foam brushes. I could have used stain and foam brushes that I already had, but I'm pretty sure the stain is in the garage is either a. frozen or b. dried out because I didn't put the lid back on it all the way. And the foam brushes? I know I have some, I just figured it was easier to buy them rather than rummaging through the house. The paint I had on hand.

Before:


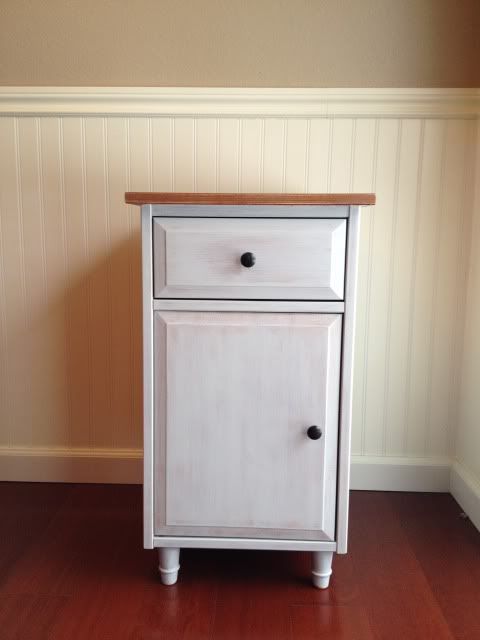
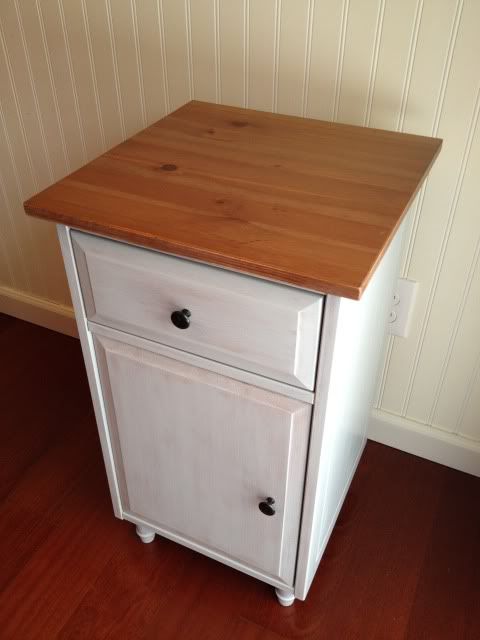
After:


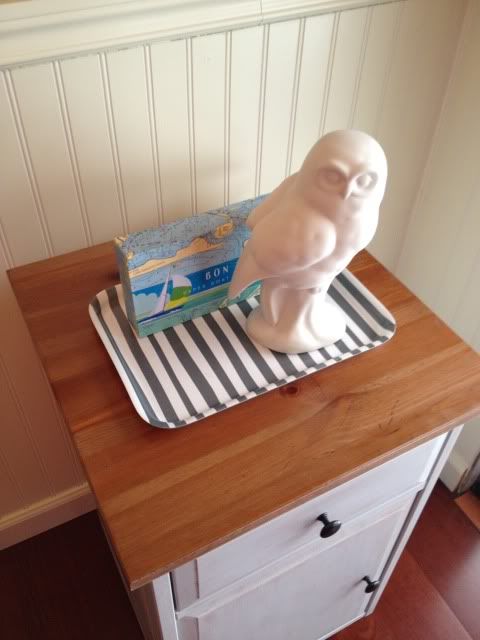
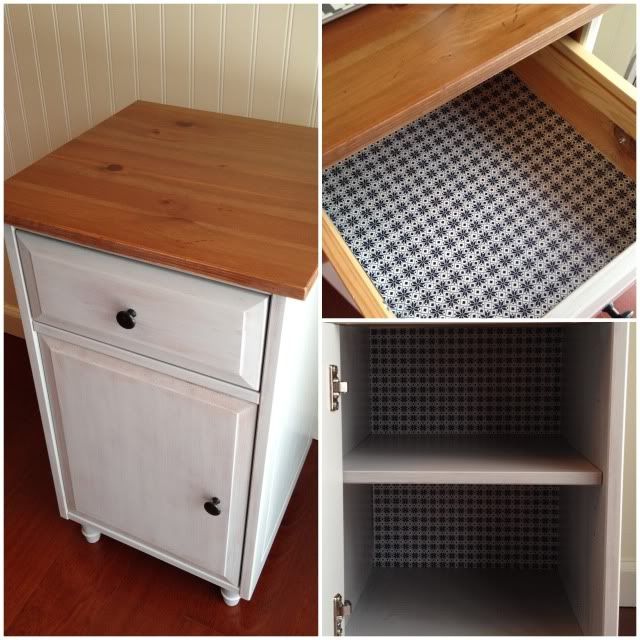
And now for staged photos with random props gathered from my house:

Bon Voyage Note Cards - Gift from Ashley
White Ceramic Owl - Gift from my mother
Gray & White Tray - Ikea circa 2010

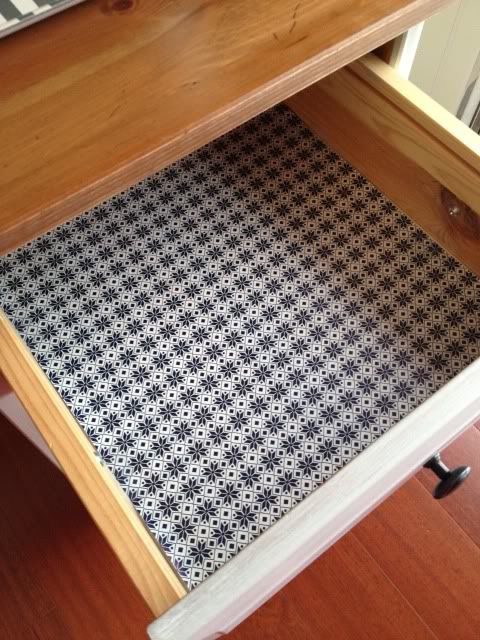
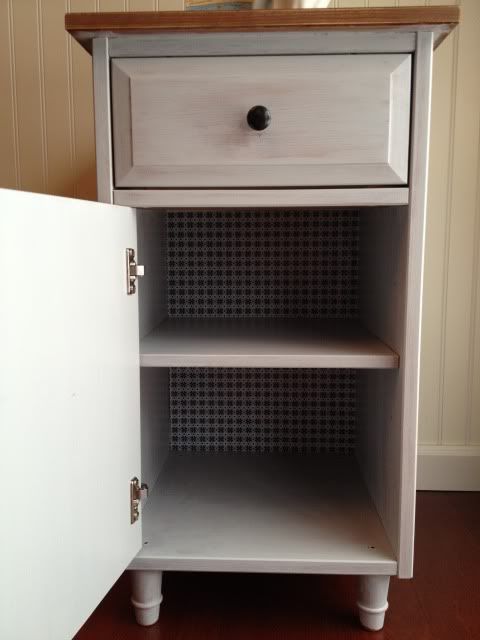
And check me out. Pizazzing up the insides!

Wrapping Paper cut to size - IKEA circa 2010

You were pretty cute before little thing, but you're fitting the beach cottage chic of my bedroom even better now!


Stain: Minwax Red Oak
Paint: Martha Stewart Driftwood
Both available at Home Depot.

If you're thinking of tackling a small project like this, it's easy! You could get away with purchasing a tester bottle of the Martha Stewart paint for around $3, a small can of stain for $5 and a couple foam brushes (one for the paint, one for the stain). I applied two less than perfect coats of paint with a large foam brush and three coats of stain. I wanted a worn, shabby look, so in between coats I sanded a bit with an ultra fine sanding block I had on hand and rubbed a little stain along the edges of the drawer and door. 

And that's that! Hope you enjoyed!

Tuesday, August 23, 2011

The Baby Shower

I was treated to the most beautiful shower I've ever had the pleasure of attending. My mom and her friends are absolutely amazing when it comes to planning. The decor was gorgeous and the food was delicious. I'm lucky enough to have cousins who bake like professionals and they provided the most amazing cake and cupcakes.

Myself, my mom and my sister.

The shower theme was nautical. We love living on Whidbey Island, we love the ocean that surrounds us and we love our boat. We are so excited to introduce the northwest island life to our son and nothing fits us better than all things nautical.

The afghan on the left with the anchor was hand made by my cousin, Rachel. She did an amazing job. The quilt on the left was made by our close friend and neighbor, Uschi. The quilt was one of my very first gifts for the baby. I completely skipped a bedding set because of this quilt. The rocking horse is from my friend, Alison. She stained it to match his bedroom.

Poms, eyelet lanterns and stars hung above the food table. They've all come home with me to hang in his bedroom. The giant frame was held chicken wire - I took photos early so you don't get to see all the adorable photos that were attached of his ultrasounds, my weekly belly photos and a few of me as a child.


The shower was at 11:00am, so we had a brunch spread. It was delicious. Mini crustless quiches, strawberry spinach salad with the most amazing dressing I've ever tasted and fresh bakery bread.


There was a great sparkling fruit punch along with lemon water. We drank from mason jars and each little straw had the cutest little striped red and blue flags on them.

The cupcakes were made my the Cupcake Queen herself, my cousin Rachel. She knows how much I love fondant and she made marshmallow fondant star toppers for each cupcake. I'm also a frosting girl, and she totally outdid herself on the frosting for these cupcakes. I was in heaven.

My cousin, Brynn made the blue velvet ruffle cake. I'd come across a picture of one on Pinterest and had to have it. This is the absolute best velvet cake I've ever eaten in my life. The frosting was cream cheese and sadly didn't like the sun. But I don't care, it was delicious! My sister came across this adorable whale topper and my brother colored it for her. It was pretty sweet of him!


The blessing table was incredible. Each guest wrote a sweet note to our baby boy and hung it on the line. At the end of the shower they were collected in a small album for me to take home. I'll get to read each blessing and prayer to him as he grows.

Pinwheels made the center pieces on each table and were the favors for our guests to take home. My mom let me help with these, which I loved. I'm a crafty person so I was happy I got to help with something!

The little guy was spoiled rotten!

Carrie, Jennifer, Mom & Lisa

These are the ladies that made it happen. Carrie hosted in her gorgeous back yard, making for one heck of a garden party. They all helped my mom collect and implement ideas. They set up and took down the entire thing and also helped prepare the food. They're amazing and my mom is so lucky to have the best friends.

There are more pictures floating around on other cameras. When I end up with those I'll post more of the fun. A big thank you to everyone who made the shower so incredible special. I felt beyond blessed. From those who helped plan and put on, to those friends and family members that attended. It was an amazing day I'll never forget.

Thursday, August 11, 2011

A project! Baby Boy's Cradle

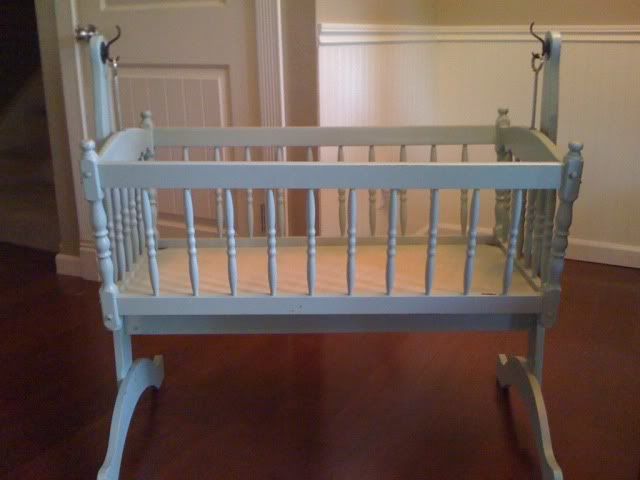
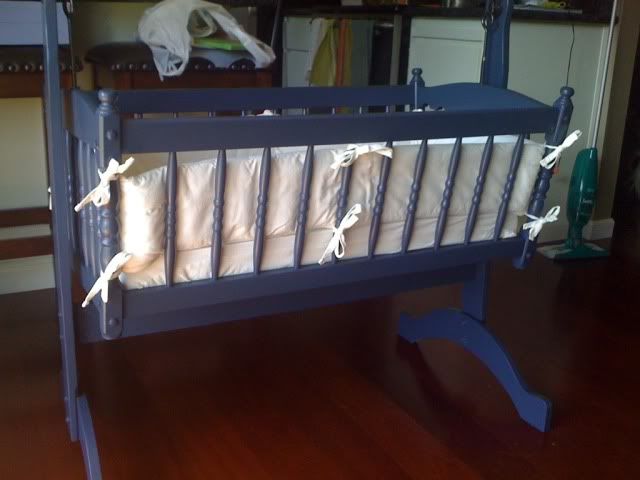
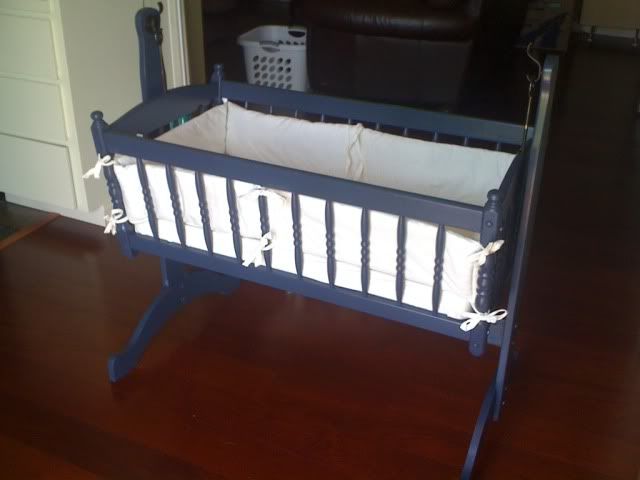
I am so excited to be sharing this before and after. I couldn't be bothered to take any better pictures, but they still show just how beautiful this piece of furniture is.

I was searching Craigslist several months ago for a dresser for the baby's room. I had no luck with a dresser, but I did find this great cradle! I sent a picture of it to my husband who immediately replied that we must have it. The next day I picked it up from a darling military family in town. Her very last little boy had outgrown it and she was (not so ready) to part with it.

We wrangled it in to the back of my sister's Volkswagon Beetle (boy was that a task!) and went on our merry way. We made a pit stop at the grocery store on the way home, and while inside a woman spied the cradle in the back seat of the car. She was in the process of leaving us a note about it when we came out. Her daughter-in-law was due in September and she wanted to know if we were selling it. Nope! Sorry! She was bummed, but wished me well.


It's an old piece that had obviously been modified and that was just fine. I'd take it apart to paint it and put it back together ensuring it's stability. It also came with a brand new mattress, off white sheet and set of bumpers (only 3 months used). I'd started pulling it apart to prep it and realized I should probably take a before picture.


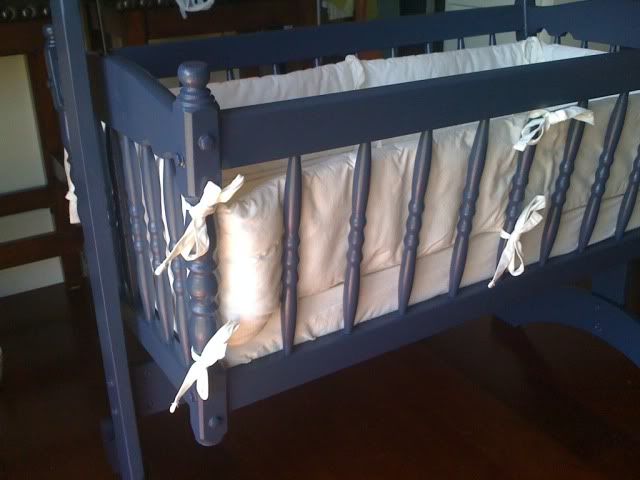
I absolutely love the way it turned out. It took some sanding and wiping down to prep it. Then it took a tedious 4 coats of paint with a foam brush. I actually chose to pick up a quart of Martha Stewart's Wrought Iron (the lighting doesn't really do the color justice) rather than using spray paint. Baby boy's color is a dark muted navy blue. There just weren't a lot of options in spray paint matching what I really wanted for this piece and it would have been far more expensive for the amount of cans I needed. I didn't even use 1/4 of my quart of paint and now I have more left over for other projects for his room. I did pick up a can of spray paint matching the hooks the cradle hangs from for the rest of the hardware.

This picture doesn't show the completed project. The eye bolts currently on the cradle are old and rusted. We weren't able to find the same size at the hardware store so we attempted to spray them to match the hooks. Problem was, we can't tighten the bolts at the bottom any farther up. This means the stop on the cradle (the function is there, but we have to create a new stop) won't work. Can't have the baby unsecured while sleeping and unattended. We've picked up some marine rope that we'll be replacing the eye hooks with, keeping with my nautical feel. We can then adjust the height to ensure the stop works properly.

The stop is a small dowel that I painted the same color as the hardware. We picked up a small crystal knob to attach to the end of the dowel to place and remove the stop. It will be attached to the frame with a piece of marine rope so that it doesn't get lost. If I don't attach it, I'll lose it for sure. That's just how I am! I am overall pleased with the quality of this old piece and the stability after modifying it. I can't wait to have baby boy sleeping in it!

Total project cost:

Cradle: $40
Paint: $13
2 foam brushes: $1
Spray paint: $8
Dowel: $1
Decorative knob: $4
Rope: $5

Total: $72!

Still less than half the price of a brand new cradle and the bedding was included! I love to restore old peices and I know that as we use this for our son and future children, that mommy and daddy made it just for them. Love that!

The cradle will be decorated with a custom pillow that I plan to make, along with two very adorable blankets I've crocheted for my little man. It will all be ready for his arrival so I'll have pictures posted of it in it's final resting place before he gets here!

Tuesday, March 29, 2011

Blog Love: The Way We Are

I'm starting a new feature here on understated, sharing my most loved daily reads. Here's the first installment, enjoy!

I don't remember how Leah and I crossed paths here in the blog world, but I'm so glad we did. She shares the same eclectic style that I love for my own home and posts really wonderful inspirational photos of things she's found and of her fabulous house! Leah is so sweet and bubbly and shares her time with her readers, keeping up with their blogs too!


Her 'Monday at my Home' posts are some of my favorites! I love watching her home evolve.


{all images via The Way We Are}

Please stop over and see Leah, say hi and soak up all of her dreamy inspiration for your own home!

Thursday, December 16, 2010

Receiving is the sweetest thing.

This post is so overdue. On Thursday I received a package on my doorstep from none other than my blogging BFF, Ashley! I was so excited.

I found it on my way out the door, so I put in the car and opened it at work with in front of my coworkers. They were just as excited as I was. I wish I'd had the patience to remember to take pictures before I tore in to it, but I didn't.


She made this! I was beside myself. I love it so much! It fits perfectly with my love for all things yarn, my love for traditional Christmas colors, yet a fabulous vintage touch. Man, this girl knows me!


I've wanted this Asker from Ikea since she first showed it in her kitchen. Super clever to hang on the wall for your sponge!


Two gorgeous nail polishes. Hidden Treasure on the left, Chinchilly on the right. I wore Hidden Treasure on my nails to a Christmas party on Saturday.

Thank you so much, Ashley! I love this little blogging community and the friends I've made. Can't wait to get the next package out in the mail to you!

Monday, September 20, 2010

♥

If this was mine, I'd never need to leave my bedroom. I'm afraid it's a touch to girly for the husband though. A girl can still drool though, right?


If you haven't checked out belle maison, you're truly missing out. By far my absolute favorite decor blog. Julie has a true talent here.

Tuesday, August 24, 2010

A Junky Chair: Part 2

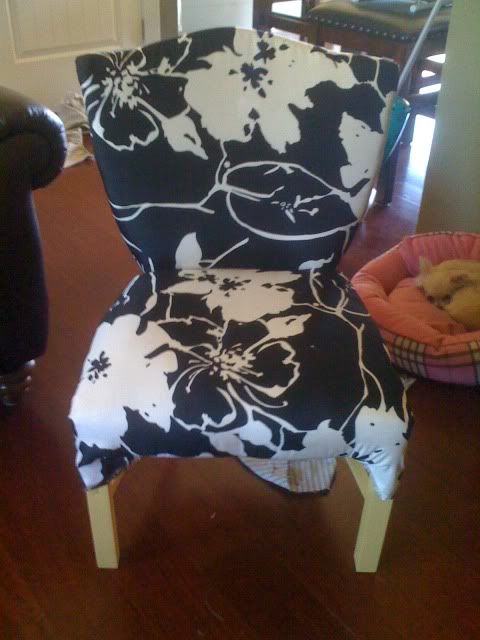
The junky chair is complete (see the beginning here)! The little silver nail heads came and after a week of working on it when I felt like it, the back is on and the chair is complete. It's quite adorable. Not the best upholstery job, but it was my first and I know next time will be better.


The back panel was the biggest challenge. Not a beautiful job, so thankfully it's on the back side.

I didn't manage to get the nail heads in perfectly straight but part of it is illusion because of the print of the fabric. It does make it look very polished.

My little Zoey looks terribly cute on the chair. Too bad she would rather look at Kenzie rather than the camera. I promise I don't force my dogs to do things they don't want to do, like pose for pictures. Otherwise you'd see a lot more of them.

The chair was a good experience. Can't wait to get my hands on a great wingback chair and see what I can muster out of it!

*I've linked this project up with a lot of other fabulous projects over at Funky Junk Interiors!*

Sunday, August 15, 2010

Color suggestions, anyone?

I bought the junky chair without really knowing where to put it. The guest bedroom won. Mostly because I had to figure out a plan before my husband got home and I got the look.

I've been on a junk collecting rampage as of late. So I have new end tables to paint for the guest bedroom, I need to repaint the bed frame and finish up the junky chair. Then all I'll have left is a trip to Ikea to pick up the rest of my curtains and duvet and it will be set***.

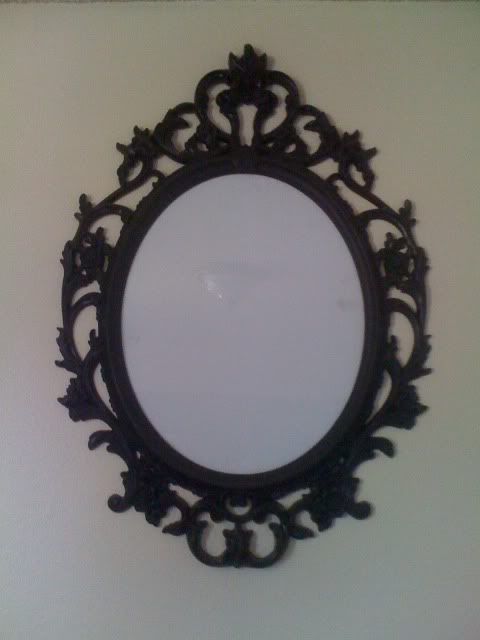
I've had this lovely frame from Ikea for about 3 years now. It's hung on the wall empty the entire time. I have no idea what to put in it but mostly, I don't know what color to paint it.


The junky chair is yellow, black and white. The bed frame and tables will be white. Suggestions? The duvets I'm choosing between at Ikea are both white - one with a gray patter and the other with a light floral pattern. Oh the decisions.

Suggestions would be greatly appreciated!


*** I have major ADD, apparently. I've made no progress on the master and am collecting so much junk I have to find a new room to put it in. Hello spare bedroom. I need an intervention.

Saturday, August 14, 2010

A Junky Chair: Part 1

I've been insanely busy with work. Lots of OT to fill, lots of hours away from home. I had just one full day off to do something of my choosing over my last (should have been 4 day) weekend. Husband was out of town and I was left with no rules.

So I shopped.

At the thrift store I scored two great finds.

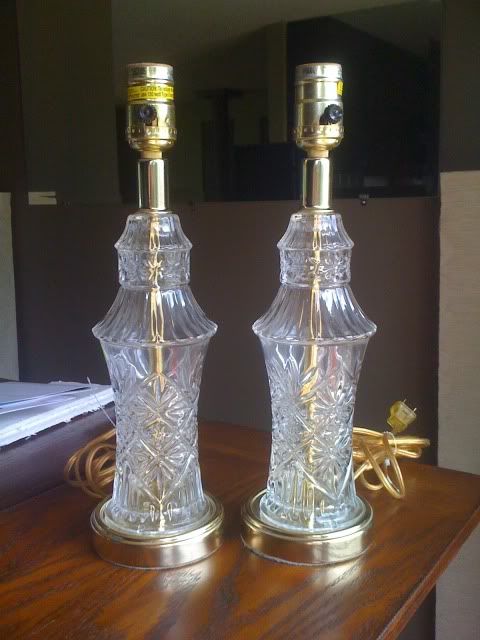
These matching lamps
&

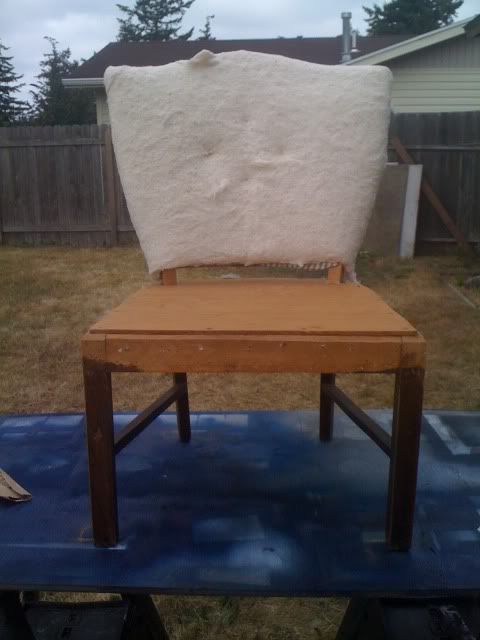
a junky chair.

I spied this junky chair on the tippy top shelf at the thrift store (like Walmart aisle high). I pulled it down hoping I wouldn't have a dramatic accident. I love it, so it came home with me.

I left the thrift store with an idea in my head and went straight to Home Depot. I then carted out 9 cans of spray paint and primer. Then off to Walmart to browse the fabric section.

You surely can't beat $1.50 a yard. Or the fact that the girl cutting the fabric kindly gave me extra because she felt there was just a little too much fringe that I'd probably have to cut off. What a sweetie.


I carefully removed all of the old fabric and the bottom cushioning. I sanded and wiped down the legs.

I primed, then painted the bottom half of the chair a lovely yellow. While it dried I went inside and cut my pattern out of the new fabric. Carefully removing the old fabric allowed me to use it as a pattern. I cut the new fabric just a tad bit bigger in case I made any mistakes. Which of course I have, and have to fix. But thankfully I have the room to do it!

The back went on nicely. I was super pleased. I used a heavy duty stapler to attach the fabric. One I borrowed from my neighbor who wasn't home. Their son was. He only gave me the stapler, and no extra staples. There weren't many in there and with as shy as I am, I couldn't make myself go back over to knock on the door again.

"Um hi... While I'm using your stapler to recover a chair for my house, how about you provide me with all the staples for the job too..."

My conservation powers still made for a killer staple job.

The seat was a little more testy.

The skirt was my biggest enemy. This chair was all no-sew. The skirt was cut from the edge of the fabric and then folded in half to create a clean bubble hem. I fused the top together with hemming tape, then folded the top again to create a lip to attach the skirt to the chair without staples or nails showing.

I also ran out of staples, so thankfully I saved the old upholstery nails from the last job. I even added little pleats along the way.

I'm pretty happy with how it turned out so far. The picture doesn't really do the look of the fabric justice one bit. The back still isn't attached because I don't want any nails showing like the previous job had done. So I found the pretty silver upholstery nail heads online and ordered them up. As soon as they're here I'll line the top of the skirt and around the back to attach the last piece of fabric. With paint drying and a beer break it took about six hours.

Fun none the less! Can't wait to share the finished product. Oh, and the lamps too!


Check out where I've shared my junky chair:
UndertheTableandDreaming