
I was searching Craigslist several months ago for a dresser for the baby's room. I had no luck with a dresser, but I did find this great cradle! I sent a picture of it to my husband who immediately replied that we must have it. The next day I picked it up from a darling military family in town. Her very last little boy had outgrown it and she was (not so ready) to part with it.
We wrangled it in to the back of my sister's Volkswagon Beetle (boy was that a task!) and went on our merry way. We made a pit stop at the grocery store on the way home, and while inside a woman spied the cradle in the back seat of the car. She was in the process of leaving us a note about it when we came out. Her daughter-in-law was due in September and she wanted to know if we were selling it. Nope! Sorry! She was bummed, but wished me well.
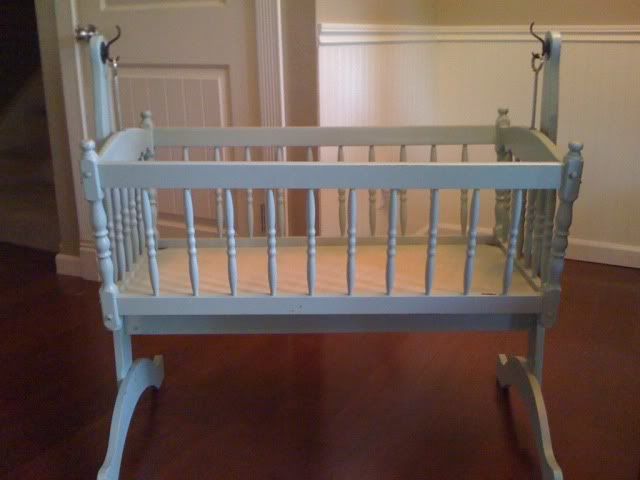
It's an old piece that had obviously been modified and that was just fine. I'd take it apart to paint it and put it back together ensuring it's stability. It also came with a brand new mattress, off white sheet and set of bumpers (only 3 months used). I'd started pulling it apart to prep it and realized I should probably take a before picture.
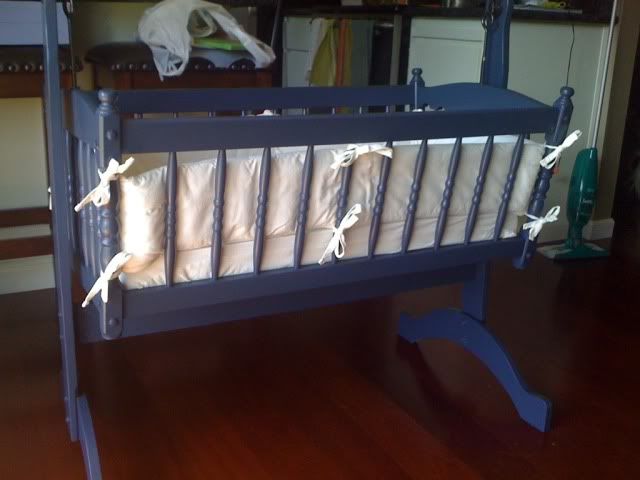

I absolutely love the way it turned out. It took some sanding and wiping down to prep it. Then it took a tedious 4 coats of paint with a foam brush. I actually chose to pick up a quart of Martha Stewart's Wrought Iron (the lighting doesn't really do the color justice) rather than using spray paint. Baby boy's color is a dark muted navy blue. There just weren't a lot of options in spray paint matching what I really wanted for this piece and it would have been far more expensive for the amount of cans I needed. I didn't even use 1/4 of my quart of paint and now I have more left over for other projects for his room. I did pick up a can of spray paint matching the hooks the cradle hangs from for the rest of the hardware.
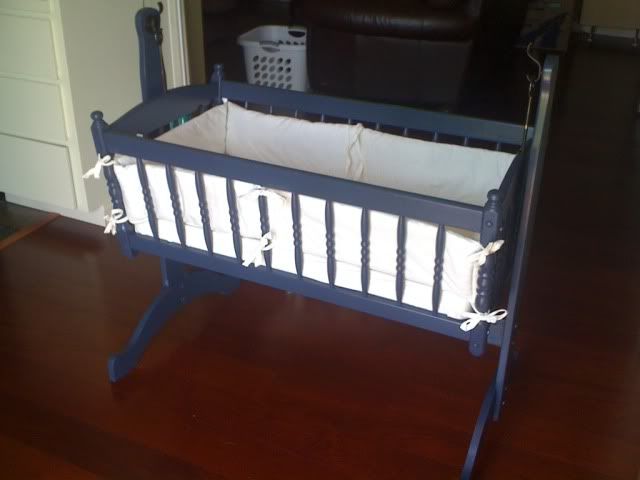
This picture doesn't show the completed project. The eye bolts currently on the cradle are old and rusted. We weren't able to find the same size at the hardware store so we attempted to spray them to match the hooks. Problem was, we can't tighten the bolts at the bottom any farther up. This means the stop on the cradle (the function is there, but we have to create a new stop) won't work. Can't have the baby unsecured while sleeping and unattended. We've picked up some marine rope that we'll be replacing the eye hooks with, keeping with my nautical feel. We can then adjust the height to ensure the stop works properly.
The stop is a small dowel that I painted the same color as the hardware. We picked up a small crystal knob to attach to the end of the dowel to place and remove the stop. It will be attached to the frame with a piece of marine rope so that it doesn't get lost. If I don't attach it, I'll lose it for sure. That's just how I am! I am overall pleased with the quality of this old piece and the stability after modifying it. I can't wait to have baby boy sleeping in it!
Total project cost:
Cradle: $40
Paint: $13
2 foam brushes: $1
Spray paint: $8
Dowel: $1
Decorative knob: $4
Rope: $5
Total: $72!
Still less than half the price of a brand new cradle and the bedding was included! I love to restore old peices and I know that as we use this for our son and future children, that mommy and daddy made it just for them. Love that!
The cradle will be decorated with a custom pillow that I plan to make, along with two very adorable blankets I've crocheted for my little man. It will all be ready for his arrival so I'll have pictures posted of it in it's final resting place before he gets here!
No comments:
Post a Comment